In real estate marketing, visuals often speak louder than words. A compelling image can drive a buyer’s decision faster than any description. One critical factor behind these impactful images is color correction.
What Is Color Correction?
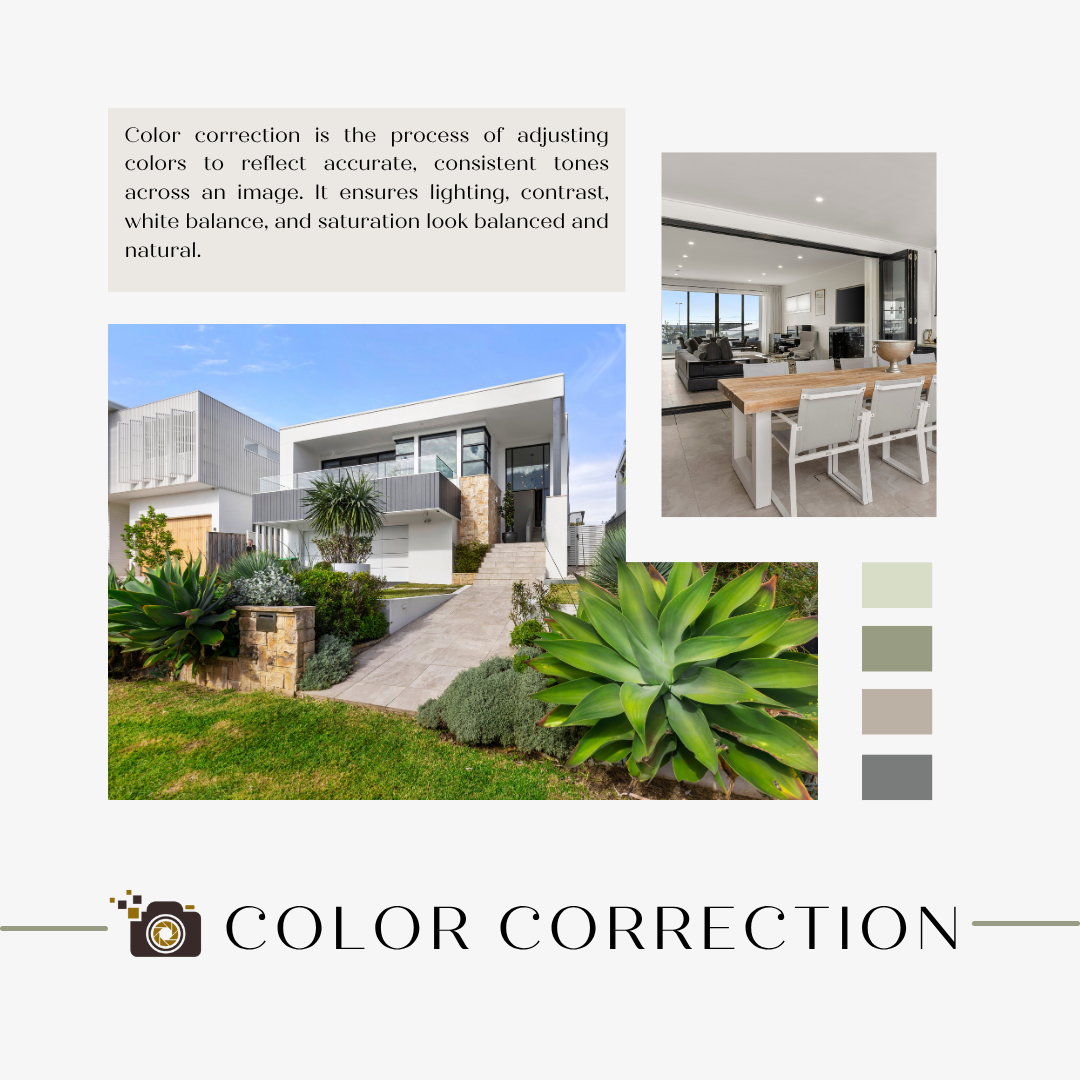
Color correction is the process of adjusting colors to reflect accurate, consistent tones across an image. It ensures lighting, contrast, white balance, and saturation look balanced and natural.
This technique goes beyond aesthetics. It plays a major role in how viewers emotionally respond to what they see. That’s why it has become a must-have in modern real estate media.
Why Viewer Emotion Matters in Real Estate
According to a 2024 report by the National Association of Realtors (NAR), 95% of buyers use online visuals to start their home search. More than 70% say high-quality images influence their perception of the property.
Human emotions react within seconds. Warmth, trust, or even urgency can be evoked by the appropriate color tone. In contrast, dull or poorly lit photos may cause viewers to quickly scroll past a listing.
Color correction helps create an emotional trigger that keeps potential buyers engaged.
The Psychology Behind Color in Real Estate
Colors evoke specific emotional responses. For example:
- Warm tones (like beige or soft yellow) create a feeling of comfort.
- Cool tones (like blue or gray) promote calm and stability.
- Bright whites reflect cleanliness and spaciousness.
- Greens and browns suggest nature and balance.
When colors are corrected to emphasize these tones appropriately, listings appear more inviting and relatable.
The Role of Natural Light and White Balance
Lighting significantly impacts mood. Daylight photos must maintain a natural color temperature. If whites appear blue or yellow, it distorts the space’s feeling.
Color correction ensures the whites are neutral and the shadows stay realistic. This keeps the property looking authentic and emotionally appealing.


Real-World Application in Marketing
Top-performing real estate agents understand this. They work with editors who adjust sky tones, wall colors, grass hues, and even interior lighting. Everything must match the emotional message they aim to send.
In one case study by BeatColor, a home listing using warm-corrected tones received 38% more inquiries than its original version. The difference was simply due to adjusted color values.
Color Correction for Different Property Types
Different property types benefit from different correction styles:
- Luxury homes need clean, crisp tones to convey sophistication.
- Family homes require warm, cozy colors to suggest livability.
- Urban condos benefit from bold contrast to show modern energy.
- Vacation properties often use vibrant tones to highlight sunlight and relaxation.
Understanding your audience is key. Color correction tailors the visual tone to that audience.


Video Marketing and Emotional Flow
With the rise of real estate video tours, color correction in video has also become vital. Frame-by-frame adjustments help keep the emotional tone consistent.
According to Wyzowl’s 2024 Video Marketing Report, 88% of marketers say video gives them strong ROI. But poor color quality in video can undermine trust.
Using professional correction ensures continuity across platforms—from listing sites to social media.
Mistakes to Avoid in Color Correction
Too much editing can cause mistrust. Over-saturated skies or unnaturally bright interiors can appear fake. That’s why professional teams follow industry-standard color profiles.
Consistency is also crucial. A home should look the same across all visuals—drone shots, interiors, and twilight scenes.
Color Correction Tools Used by Professionals
Most professional editors use tools like Adobe Lightroom, Photoshop, or DaVinci Resolve. AI-powered options are emerging in 2025, offering faster corrections with consistent output.
These tools help editors maintain image quality while enhancing emotional connection.
Future Trends in Color Correction
As real estate marketing becomes more immersive, color correction will adapt. Expect more integration with AI-based enhancements and real-time correction for virtual tours.
Color grading tailored by buyer personas is also emerging. For example, editors may use slightly different tones depending on target demographics, such as young couples or retirees.
Final Thoughts
In today’s fast-paced digital market, first impressions are critical. Color correction is more than a technical step—it’s a storytelling tool.
By aligning corrected colors with emotional goals, real estate professionals can attract more views, generate more leads, and build trust through visual consistency.
Whether you’re editing one photo or a full listing gallery, investing in smart color correction is no longer optional. It’s essential.
Read more:
Canva Picture Editor: A Powerful Tool for Efficient Image Editing
Top Photography Shooting Tips for Beginners
The Popular Interior Furniture Style for Living Room in 2024