
Best Lens for Real Estate Photography

Lens choice often matters more than the camera body itself when it comes to real estate photography. A great lens captures full rooms accurately, keeps lines straight, and handles the tricky lighting that interiors throw at it. This guide walks through what to look for in a lens for property photography and which types work best for different shooting situations.

Why Lens Choice Matters So Much

Real estate photos need to show a room’s true size and layout without distortion. A poor lens can make rooms look warped, cramped, or oddly proportioned, which hurts a listing’s first impression. Since buyers judge properties quickly online, lens quality directly shapes how professional and trustworthy a listing photo feels.

Key Lens Features for Real Estate Work
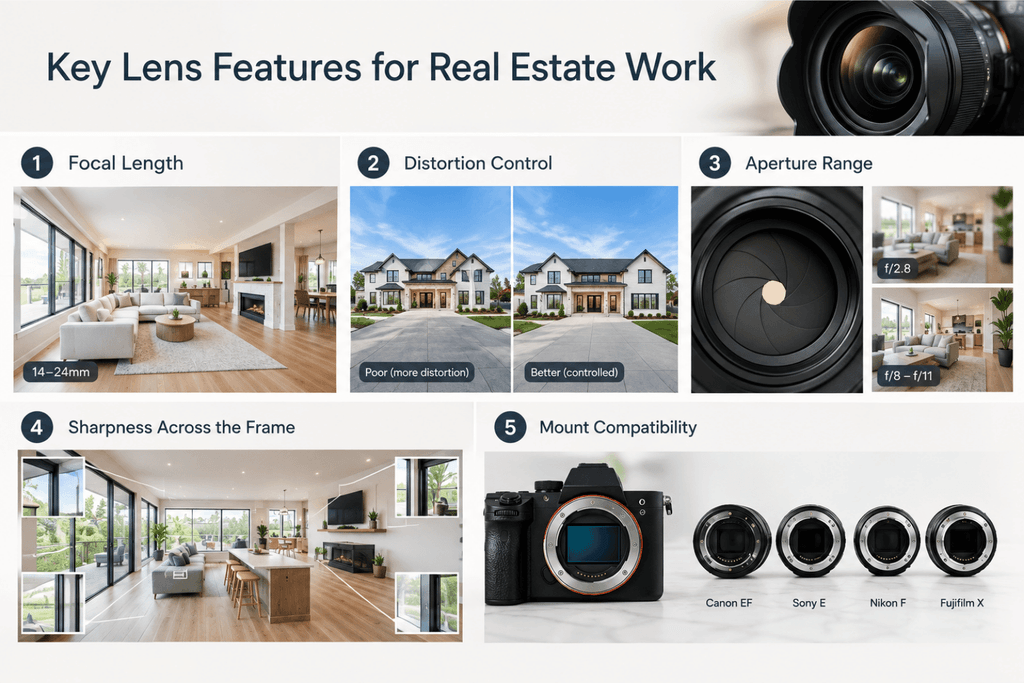
Focal Length

Most real estate photographers rely on wide-angle lenses, typically between 14mm and 24mm on a full-frame camera. This range captures enough of a room to show its full layout without pushing walls into extreme, unnatural distortion. Going wider than 14mm often introduces noticeable barrel distortion, which can make straight walls look curved.

Distortion Control

Wide-angle optics naturally introduce some distortion, but higher-quality glass controls it far better than cheaper alternatives. Look for options specifically designed to minimize barrel and pincushion distortion, since heavy distortion requires extra correction work in post-production and can still look unnatural even after editing.

Aperture Range

A wide-open aperture of f/2.8 or wider offers more flexibility in dim interiors, though real estate photographers often shoot at narrower settings like f/8 to f/11 anyway, to keep both foreground and background sharp. Still, that extra flexibility helps when shooting handheld or in low light.

Sharpness Across the Frame

Corner sharpness matters more in real estate photography than in many other genres, since wide shots often place important details — like windows, doorways, or architectural features — near the edges of the frame. Glass that stays sharp from center to corner produces far more usable, professional-looking images.

Mount Compatibility

Before buying new glass, confirm it matches your camera’s mount system. Many manufacturers now produce versions of the same optic for multiple mounts, so double-check compatibility with your specific camera body, especially if you’ve switched brands or systems recently.

Popular Lens Types for Real Estate Photography
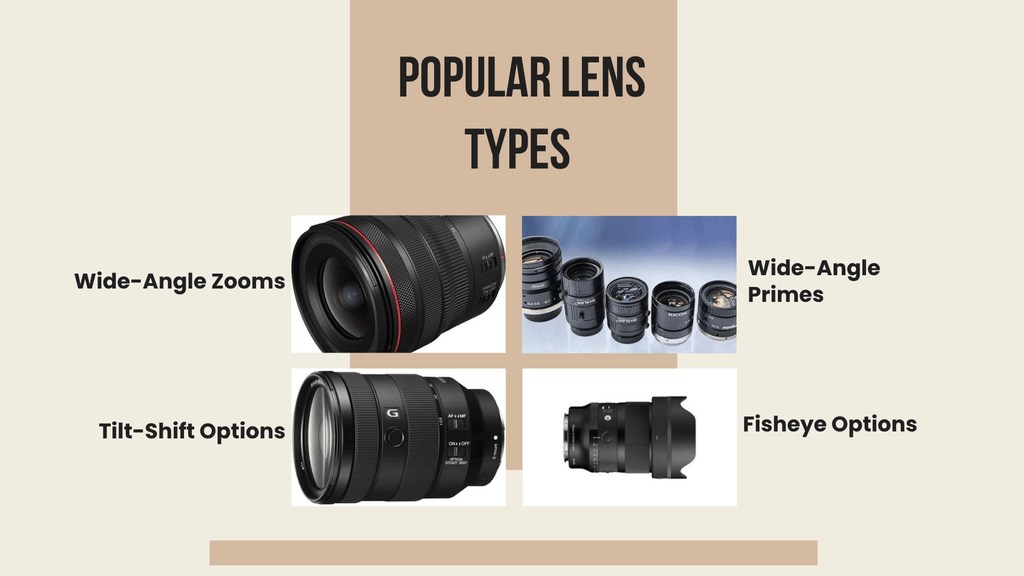
Wide-Angle Zooms

Zoom options in the 14-24mm or 16-35mm range offer flexibility across different room sizes without needing to switch glass mid-shoot. This versatility makes zooms a popular choice for photographers who shoot varied properties, from small condos to sprawling homes.

Wide-Angle Primes

Prime optics, which have a fixed focal length, often deliver sharper results and better distortion control than zooms at a similar price point. A 16mm or 20mm prime is a common choice among real estate photographers who prioritize image quality over flexibility.

Tilt-Shift Options

Tilt-shift optics let photographers correct perspective distortion directly in-camera, particularly useful for keeping vertical lines straight when shooting upwards in tall rooms. These tend to be expensive and require more manual technique, so they’re most common among experienced photographers working on high-end listings.

Fisheye Options

Some photographers use fisheye glass for extremely tight spaces, though the resulting curved distortion needs correction in editing software afterward. This option works best as a specialty tool for usually small rooms, rather than a primary choice for most shoots.

Matching Your Optic to Your Camera System

Optical performance depends heavily on your camera’s sensor size. Glass marketed as “24mm equivalent” behaves differently on a crop-sensor camera than on a full-frame body, since crop sensors effectively narrow the field of view. Always check the actual angle of view a given focal length produces on your specific camera before assuming it will capture a full room.

Budget Considerations

Prices vary widely based on brand, build quality, and aperture range. Entry-level wide-angle zoom options often start around $400 to $700, while professional-grade wide-angle zooms with wider apertures can run $1,200 to $2,000. Tilt-shift optics typically cost even more, often exceeding $1,800, due to their specialized mechanics.

For most real estate photographers, a mid-range wide-angle zoom offers the best balance of image quality, flexibility, and cost. Upgrading from a kit lens to dedicated wide-angle glass usually improves photo quality more noticeably than upgrading the camera body itself.

Conclusion

Choosing the right lens for real estate photography comes down to balancing focal length, distortion control, and sharpness against your budget and shooting style. Quality wide-angle zoom glass covers most everyday listing needs, while tilt-shift optics serve photographers working on premium properties where perspective accuracy matters most. Ultimately, investing in good glass often delivers a bigger improvement in image quality than upgrading the camera body alone.

Read more:
Best Camera for Real Estate Photography: A Buyer’s Guide
Day-to-Dusk Real Estate Editing vs. Twilight Photography Explained
Photorealistic 3D Rendering for Real Estate: Marketing Tips
Best Camera for Real Estate Photography: A Buyer’s Guide

Camera choice makes a real difference in how professional a real estate listing looks. The right camera captures sharp detail, handles tricky interior lighting, and gives you the flexibility to shoot everything from tight bedrooms to sweeping exterior shots. This guide breaks down what to look for in a camera for real estate work and highlights the features that matter most.

Why Camera Choice Matters in Real Estate Photography

Real estate photos face unique challenges that other photography genres don’t. Interiors often mix bright window light with dim corners. Rooms can feel cramped without the right lens. Buyers judge a property within seconds of seeing a photo, so image quality directly affects engagement. A capable camera helps handle these challenges consistently, shoot after shoot.

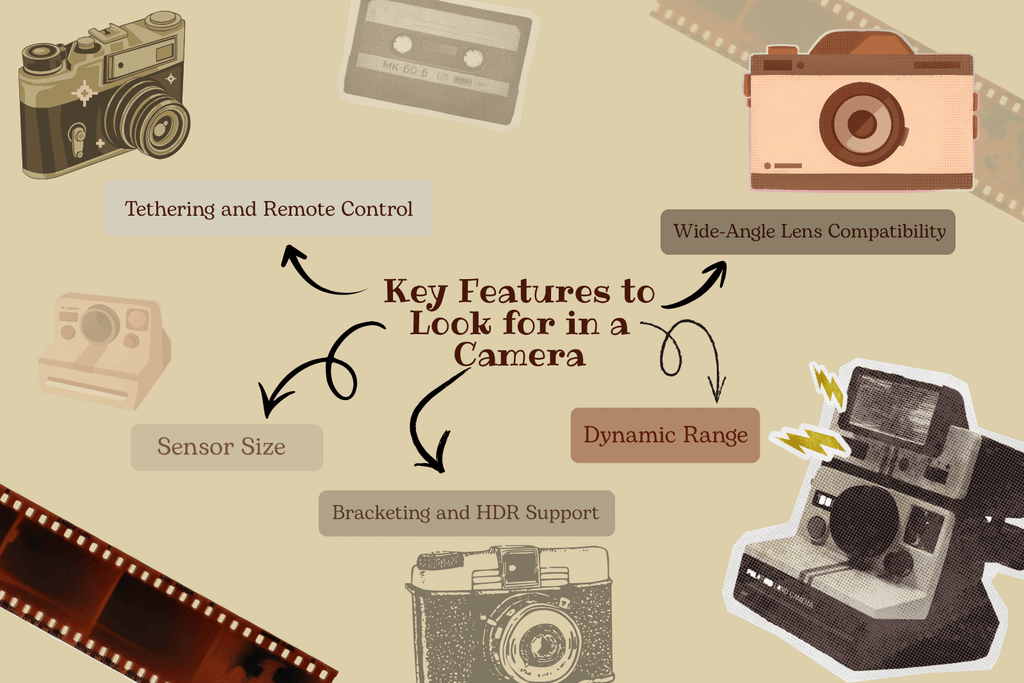
Key Features to Look for in a Camera

Sensor Size

Full-frame sensors generally perform better in low light and capture more dynamic range, which matters when balancing bright windows against darker interior spaces. However, crop-sensor cameras are lighter, more affordable, and still capable of excellent results for most listings. For photographers shooting large, high-end properties regularly, a full-frame camera often justifies the investment.

Dynamic Range

Dynamic range refers to how well a camera captures detail in both shadows and highlights within the same shot. Since real estate interiors often have strong contrast between window light and interior shadows, a camera with strong dynamic range reduces the need for heavy editing later. This feature matters more than megapixel count for most real estate work.

Wide-Angle Lens Compatibility

A camera body matters, but lens choice matters just as much. Most real estate photographers rely on wide-angle lenses, typically in the 14mm to 24mm range, to capture full rooms without excessive distortion. Before choosing a camera, check that it supports high-quality wide-angle lenses within your budget.

Bracketing and HDR Support

Built-in exposure bracketing lets a camera automatically capture multiple exposures of the same scene, which photographers then blend into a single HDR image. Nearly all modern interchangeable-lens cameras support this feature, but check how many bracketed shots the camera allows in one burst — more brackets give greater flexibility for tricky lighting.

Tethering and Remote Control

Many professional real estate photographers tether their camera to a tablet or laptop on-site, which lets them preview shots on a larger screen in real time. If you plan to build a serious real estate photography business, look for a camera with reliable tethering support through USB or Wi-Fi.

Popular Camera Types for Real Estate Work

Mirrorless Cameras

Mirrorless cameras have become the top choice for many real estate photographers. They’re lighter than traditional DSLRs, often have excellent dynamic range, and pair well with wide-angle lenses. Their electronic viewfinders also make it easier to preview exposure and white balance before pressing the shutter.

DSLR Cameras

DSLRs remain a solid, reliable option, especially for photographers who already own DSLR lenses. Battery life tends to be longer than mirrorless alternatives, and used DSLR bodies can offer excellent value for photographers just starting out.

Compact and Bridge Cameras

For photographers just beginning or working with tighter budgets, compact cameras with strong wide-angle zoom ranges can still produce solid results. They won’t match the flexibility of interchangeable-lens systems, but they lower the barrier to entry considerably.

Camera Settings That Matter More Than the Camera Itself

Even a high-end camera won’t produce great results without the right settings. A narrow aperture, typically between f/8 and f/11, keeps both foreground and background in focus. A tripod allows for slower shutter speeds without introducing blur, which helps in dim interiors. Shooting in RAW format, rather than JPEG, preserves far more detail for editing later, which matters significantly for HDR blending and color correction.

Budget Considerations

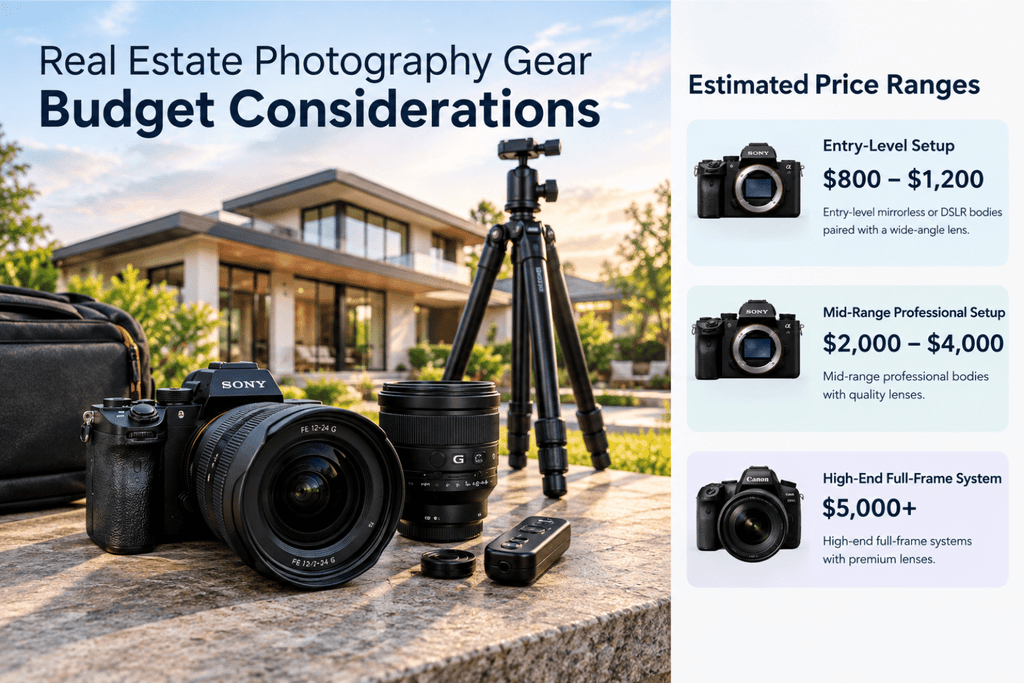
Camera bodies for real estate photography span a wide price range. Entry-level mirrorless or DSLR bodies paired with a wide-angle lens can start around $800 to $1,200 for a complete setup. Mid-range professional setups often run $2,000 to $4,000, while high-end full-frame systems with premium lenses can exceed $5,000.

For most real estate photographers, a mid-range mirrorless body with a quality wide-angle lens offers the best balance of image quality, dynamic range, and cost. Investing in a sturdy tripod and a remote shutter release often improves results more than upgrading to a more expensive camera body.

Conclusion

Choosing the right camera for real estate photography comes down to balancing sensor performance, dynamic range, and lens compatibility against your budget. Mirrorless cameras currently lead the pack for most professionals, thanks to their lighter weight and strong low-light performance, but a well-configured DSLR can still deliver excellent results. Ultimately, a good camera provides the foundation for great real estate photos, but consistent technique, proper settings, and quality post-production editing are what truly separate professional listings from amateur ones.

Read more:
Day-to-Dusk Real Estate Editing vs. Twilight Photography Explained
What Is Window Pull Editing? How to Fix Blown-Out Windows in Real Estate Photos
Professional Real Estate Editing in the AI Era

Day-to-Dusk Real Estate Editing vs. Twilight Photography Explained

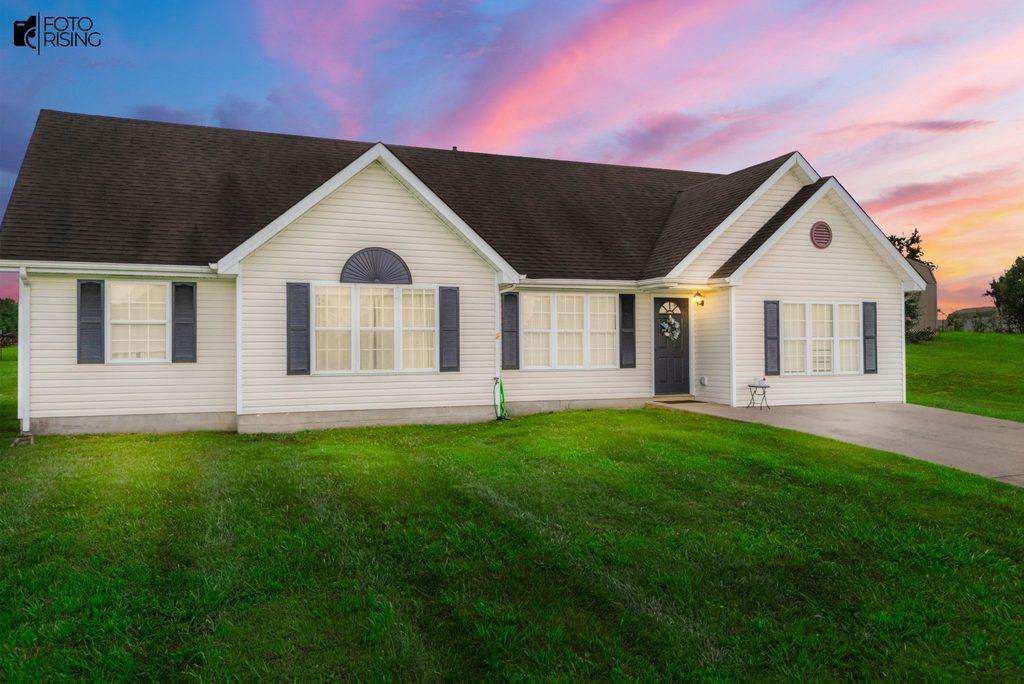
A property photo taken during golden hour sells a lifestyle, not just a house. The warm sky, glowing windows, and soft shadows turn an ordinary listing into something buyers want to imagine themselves living in. However, two very different techniques create that effect: true twilight photography and Day-to-Dusk real estate editing. Many agents and photographers use these terms interchangeably, yet they involve different workflows, costs, and outcomes.

This guide breaks down both methods so you can decide which one matches your budget, timeline, and property type. By the end, you will understand exactly when Day-to-Dusk real estate editing makes more sense than a live twilight shoot, and vice versa.

What Is Twilight Photography?

Twilight photography captures a property outdoors during the actual sunset window, usually within a 20 to 30 minute span after the sun dips below the horizon. During this time, the sky still holds a soft blue or purple glow, while interior and landscape lights create a warm, inviting contrast.

twilight

How the Twilight Shoot Process Works

First, the photographer arrives at the property before sunset to prepare interior lighting, pool lights, and exterior fixtures. Next, they wait for the exact golden window, since timing is everything in this technique. During the shoot, they use bracketed exposures to balance the darkening sky with the artificial light sources. Finally, they blend these exposure layers in post-production to produce one polished image.

Advantages of Twilight Photography

Because everything is captured live, the lighting, shadows, and reflections remain completely authentic. Additionally, the sky color reflects the real weather conditions of that specific evening, which adds a unique, unrepeatable quality to each image.

Drawbacks of Twilight Photography

On the other hand, this method depends heavily on clear weather, so a cloudy or rainy evening can ruin an entire shoot. Furthermore, the cost tends to be higher since it requires a dedicated crew, lighting equipment, and extended on-site time. Since only one property can be photographed per sunset window, this approach also limits how many listings a photographer can handle in a single week. If the crew misses that narrow window, they must reschedule for another day, which delays marketing timelines even further.

What Is Day-to-Dusk Real Estate Editing?

Unlike a live twilight shoot, this technique, often called Day-to-Dusk real estate editing starts with a standard daytime photograph. Editors then use software such as Photoshop or specialized AI tools to transform the sky, adjust the overall lighting, and simulate a warm evening atmosphere.

How the Editing Process Works

To begin, the photographer captures the property during regular daylight hours, which removes any dependency on sunset timing. The image then goes to an editing team or an AI-powered platform. From there, editors replace the sky, correct the color temperature, and digitally illuminate windows to mimic interior lighting. Most providers return the finished image within a few hours to two days, depending on the service level.

Advantages of This Technique

Since the process does not rely on weather or a specific time slot, photographers can shoot properties at their convenience. Moreover, the overall cost stays lower because no lighting crew or after-hours labor is required. This efficiency also allows agents to process multiple listings simultaneously, which suits high-volume real estate teams. As an added benefit, editors can experiment with different sky styles until the image matches the desired mood.

Drawbacks of This Approach

That said, poorly executed edits can look artificial, particularly when daytime shadows do not match the simulated evening light. In some regions, MLS platforms also require disclosure when a listing photo has been digitally altered. Consequently, this method demands either a skilled editor or a high-quality AI tool to avoid an unnatural result.

Day to Dusk before
Before
Day to Dusk after
After

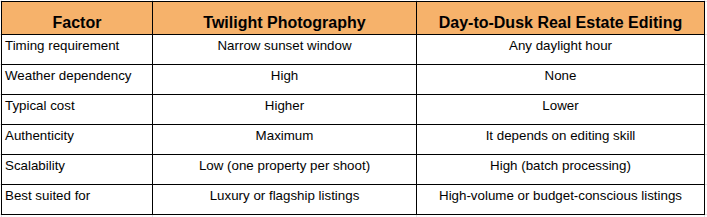
Twilight vs. Day-to-Dusk Editing: A Side-by-Side Comparison

Twilight vs. Day-to-Dusk Editing: A Side-by-Side Comparison

When Should You Choose Real Twilight Photography?

Twilight shoots work best for luxury homes, estates, or properties with standout features like a pool, waterfront view, or dramatic landscaping. If your marketing budget allows for a signature hero image, this technique delivers unmatched authenticity. It also makes sense for listings with a prime location, since real sunset light naturally enhances a skyline or waterfront view.

When Should You Choose the Edited Approach?

If you manage several listings and need fast turnaround, Day-to-Dusk Real Estate Editing becomes the more practical choice. It also works well in regions with unpredictable weather, where scheduling a live sunset shoot is risky. For mid-range or entry-level properties, this technique delivers strong visual impact without the added expense of a twilight crew. Finally, when a listing needs marketing-ready photos within hours rather than days, editing offers the speed that live photography cannot match.

Final Thoughts

Neither method is universally better; each simply serves a different purpose. Twilight photography remains the gold standard for authenticity and works best on premium properties with a marketing budget to match. Meanwhile, this editing technique offers a flexible, cost-effective alternative that scales easily across multiple listings.

As AI-powered tools continue to improve, the gap in realism between the two methods keeps narrowing. For agents who need speed, consistency, and control over their photo budget, day-to-dusk real estate editing is quickly becoming the smarter default choice without sacrificing visual appeal.

Read More

What Is Window Pull Editing? How to Fix Blown-Out Windows in Real Estate Photos

Sky Replacement for Real Estate Photos: A Smart Way to Elevate Listings

What Is Window Pull Editing? How to Fix Blown-Out Windows in Real Estate Photos

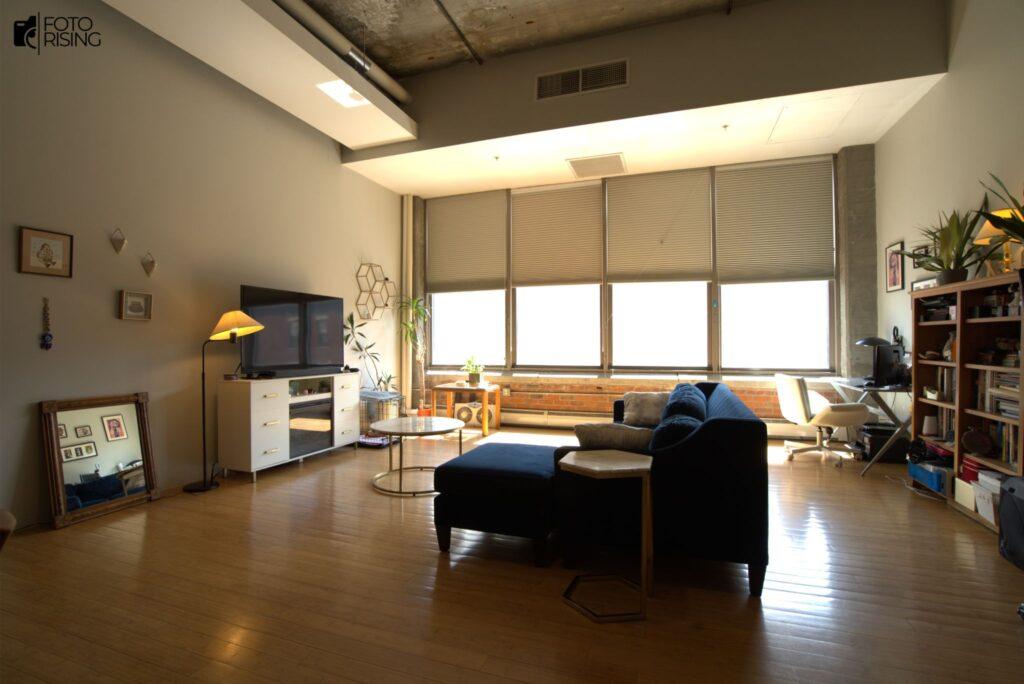
You just shot a gorgeous living room, natural light pouring in everywhere, but when you pull up the photo on your computer, the window is a blank white blob with no view at all. This is a familiar headache for almost every real estate photographer, and window pull editing is the post-processing technique built specifically to fix it. In this article, we’ll cover what window pull editing is, why windows blow out so often in real estate photography, and the full step-by-step process for getting a photo that shows both a beautifully lit interior and a crisp view outside.

1. What Is Window Pull Editing?

Window Pull Editing is a post-processing technique that balances the exposure between a room’s interior and the scene visible through its windows, so both areas show up clearly in the same photo. Instead of letting the window blow out into a lifeless white patch, this technique “pulls” the correctly exposed details of the outdoor scene into the shot, letting viewers see the backyard, pool, or landscape surrounding the property.

The name “window pull” comes directly from this action: the editor pulls the properly exposed window area from one exposure and blends it into another photo where the interior is exposed correctly. In essence, the technique mimics how the human eye sees a room, our eyes constantly adjust to see detail in both bright and dark areas at once, while a camera sensor has a limited dynamic range and simply can’t capture that same range in a single shot.

People often confuse window pull editing with standard HDR blending. The key difference is that window pull usually focuses on the window area specifically, using manual or semi-automatic masking, while HDR blending tends to merge the entire image algorithmically across multiple exposures.

window pull editing before
Before
window pull editing after
After

2. Why Do Windows Blow Out in Real Estate Photos?

The root cause is the huge gap in light intensity between the inside and outside of a home. Interior lighting, even with the lights on, is almost always much dimmer than natural daylight outside. When a camera meters the scene and picks its exposure settings, it’s forced to choose one of two outcomes:

  • Expose correctly for the interior → the window blows out completely
  • Expose correctly for the window → the interior goes dark and loses detail

This is exactly why window pull editing has become a standard step in professional real estate photo editing. From a business standpoint, losing detail through the window means losing one of a property’s biggest selling points, a backyard, pool, or mountain view is often what makes a buyer click on a listing in the first place. Poor-quality listing photos that skip this detail directly hurt engagement and can slow down how quickly a property sells.

3. The Step-by-Step Window Pull Editing Process

3.1. Preparing Your Shots Before Editing

The quality of your final window pull editing result depends heavily on how well you prepare during the shoot. Key things to keep in mind:

  • Camera settings: Shoot in manual or aperture priority mode, with an aperture around f/8–f/11 for sharp focus from front to back and ISO kept between 100 and 400 to minimize noise.
  • Gear: a tripod is essentially mandatory, since it keeps your bracketed shots perfectly aligned for blending later; a remote trigger helps avoid camera shake.
  • Bracketing: Capture at least 2–3 different exposures of the same frame, one correctly exposed for the interior and one correctly exposed for the window.
  • Avoiding glare and reflections: Don’t shoot straight-on into the glass, and consider a polarizing filter to cut down on reflections.

3.2. Editing in Photoshop

Once you have your bracketed shots, the manual window pull editing workflow typically looks like this:

  1. Pick your base image, the exposure where the interior looks best.
  2. Bring the correctly exposed window shot in as a layer on top.
  3. Create a layer mask (using a manual brush or a luminosity mask) to reveal only the window area from the top layer.
  4. Match white balance and color tone between the two layers so there’s no mismatch between the inside and outside of the frame.
  5. Feather and clean up the mask edges, checking the window frame closely so the blend doesn’t look obvious.

3.3. A Companion Technique: Flambient

Flambient combines a flash-lit exposure with an ambient-light exposure. The flash shot keeps the interior bright and clean without pushing the ISO too high, while the ambient shot preserves the natural look of the window view. Because they complement each other so well, flambient is frequently paired with window pull editing to produce the most realistic result. One thing to watch for: flash can create glare on the window glass, so it helps to try a different flash angle while shooting, then clean up any leftover reflections in post.

4. Tools for Window Pull Editing

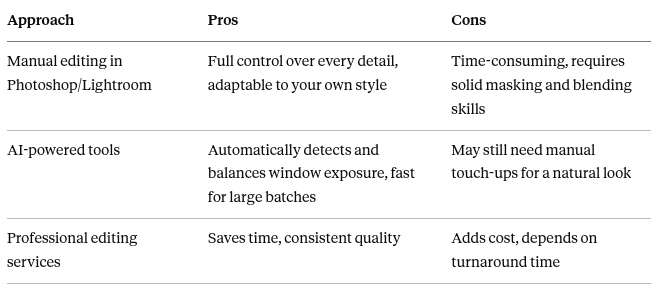
There are three common ways to approach window pull editing, each suited to a different need:

Tool for Window Pull Editing

A growing number of real estate photography studios are now leaning on AI-powered window pull editing tools, especially when paired with bracketed or HDR-merged shots, cutting down significantly on the time it takes compared to manual masking.

5. Common Window Pull Editing Mistakes (and How to Fix Them)

  • Visible mask edges: feather the mask gently and always zoom to 100% to check the window frame before exporting.
  • Color mismatch between the inside and outside of the window: use the eyedropper tool to compare colors and adjust curves or color balance on each layer separately before blending.
  • Flash reflections on the glass: change your flash angle while shooting; clean up any remaining glare with the clone stamp or patch tool afterward.
  • Halo effect around the window frame: avoid over-feathering the mask and keep a close eye on contrast at the blend edge.

6. DIY vs. Hiring a Service: Which One Should You Choose?

If you’re only editing a handful of photos and want full creative control over the style, doing window pull editing yourself in Photoshop is a solid choice, as long as you have the time and skill. On the other hand, if you’re working through a heavy volume, say, multiple properties or listings every week, using an AI tool or hiring a professional editing service will save you significant time, letting you spend more hours shooting instead of editing.

7. Final Thoughts

Window Pull Editing solves one of the most persistent problems in real estate photography: keeping both a well-lit interior and an inviting view through the window in a single, believable shot. Whether you choose to master the manual Photoshop workflow or lean on an AI tool to save time, getting comfortable with this technique will noticeably improve the quality of your listing photos and make every property you shoot more appealing. Try it out on a simple bracketed shot today and see the difference for yourself.