Sample Page

3 Biggest Mistakes in Flambient Real Estate Photography – How to Master?

In the fast-paced world of property visuals, master Flambient real estate photography techniques can make all the difference in attracting potential buyers and selling properties quickly. Flambient photography, a technique that combines flash and ambient light, has emerged as a popular choice for showcasing homes in their best light. Three final photos are often the outcome of this procedure in real estate photography. Included are one last window pull shot and two identical shots with artificial lighting and a flashlight.

It’s challenging for real estate photographers to apply all of the shooting property image techniques skillfully. Throughout the process, no matter we are amatuer or professional, we may face several photography mistakes, particularly, the Flambient mistakes. Clearly, mastering Flambient real estate photography requires more than just a camera and a basic lighting setup. Keep reading to explore the three biggest Flambient mistakes in real estate photography and practical solutions.

3 Common Mistakes in Flambient Real Estate Photography

While the Flambient technique offers dynamic and well-lit images, there are several pitfalls that photographers often encounter. Let’s delve into three common mistakes in Flambient real estate photography that can compromise the quality of your shots and how to avoid them in the next parts.

Mistake #1: Overexposure of Ambient Light

One of the most common mistakes in Flambient real estate photography is overexposure to ambient light. When the ambient light is too bright, it can wash out details, create blown-out highlights, and make the space appear flat and uninviting.

Overexposure-of-Ambient-Light-Real-Estate-Photography
Overexposure of Ambient Light can wash out details

How to Fix It:

To address overexposure of ambient light, start by adjusting your camera settings. Use a lower ISO to reduce sensitivity to light and a smaller aperture to control the amount of light entering the camera. Additionally, consider using exposure bracketing to capture multiple exposures and blend them later in post-processing. This technique allows you to retain detail in both the highlights and shadows, resulting in a well-balanced image that showcases the property in its best light.

Mistake #2: Unnatural Color Casts

Another common mistake in Flambient real estate photography in particular and in real estate photography mistakes, in general, is the presence of unnatural color casts. This occurs when the color temperature of the ambient light clashes with the color temperature of the flash, resulting in inconsistent colors throughout the image.

Unnatural-Color-Casts-Photography-Mistakes
The ambient light clashes with the color temperature of the flash

How to Fix It:

To correct unnatural color casts, pay close attention to white balance settings. It is highly recommended to start by setting your camera’s white balance to match the color temperature of the ambient light in the room. Then, adjust the color temperature of your flash to complement the ambient light. This may require using color gels or adjusting the flash’s settings to achieve a natural-looking color balance. Additionally, consider shooting in RAW format to have more flexibility in adjusting the white balance during post-processing.

Mistake #3: Harsh Shadows and Glare

Harsh shadows and glare probly detract from the overall appeal of real estate photos, making the space appear less inviting and desirable. These issues often occur when the flash is positioned improperly or when reflective surfaces bounce light in undesirable directions.

Harsh-Shadows-and-Glare-Flambient-Photography-Mistakes
Harsh shadows and glare make the space appear less inviting

How to Fix It:

To mitigate harsh shadows and glare, pay attention to the placement and angle of your flash. Setting the flash off-camera and use diffusers or modifiers to soften the light and create more natural-looking shadows. Additionally, be mindful of reflective surfaces such as glass or polished countertops, as they can bounce light in unpredictable ways. Consider using flags or black cards to block unwanted reflections and minimize glare. Experiment with different flash positions and angles until you achieve a balanced lighting setup that minimizes harsh shadows and glare.

A Vital Note: Practice Makes Perfect!

Like any skill, mastering Flambient real estate photography takes time and practice. Experiment with different lighting setups, camera settings, and post-processing techniques to refine your craft and develop your unique style. Don’t be afraid to push the boundaries and experiment with creative ideas to create compelling and memorable images.

Great-Flambient-Photography
After fixing Flambient mistakes – Great results!

Final Thoughts

In the competitive world of real estate, high-quality photography can be the difference between a property sitting on the market and a quick sale. Flambient real estate photography offers a powerful way to showcase homes in their best light by blending flash and ambient light. However, mastering this technique requires skill, practice, and an understanding of common pitfalls. With careful attention to detail and a commitment to excellence, you can elevate your real estate photography skills and stand out in a crowded market.

Read more:

Professional Real Estate Photography Boost Property Sales. What Is The Secret?

Real Estate Photography: 5 Basic Types Of Real Estate Photos

REP: 4 Common Mistakes Of Shooting Real Estate Photos?

Real Estate Photography: Shortcut Techniques Of Real Estate Photos Editing For Beginners – Expert Advice

Professional Real Estate Photography Boost Property Sales. What is the Secret?

In the realm of professional real estate photography, crafting captivating visual content is crucial. With prospective buyers primarily searching for properties online, the appeal of listings is paramount. Expert Real Estate Photography stands out as a pivotal tool for grabbing potential buyers’ attention and boosting property sales. This article reveals the strategies for creating top-notch professional real estate photos to expedite property transaction

I. The Power of Quality Professional Real Estate Photography

1. Statistics on Visual Impact in Real Estate Listings

The research emphasizes the substantial influence of high-quality visuals on real estate listings. Properties displayed through professional real estate photos not only attract more views and stimulate buyer interest but also, notably, lead to faster home sales and higher selling prices compared to listings with inferior imagery.

The Impact of Real Estate Photography Editing

2. Psychological Factors Influencing Buyer Decisions

Buyers are naturally drawn to visually compelling properties. Expert real estate photos can evoke positive emotions and ignite a sense of desire in potential buyers. By meticulously highlighting a property’s best attributes, real estate photography influences buyer decisions and fosters an inclination towards further exploration.

3. Importance of High-Quality Images for Crafting Positive First Impressions

High-quality images are essential for captivating first impressions in real estate. They convey professionalism, and attention to detail, and as well as attract potential buyers. Investing in the best professional real estate photos enhances property appeal, driving more buyer interest and transactions.

III. Techniques Employed by Professional Real Estate Photographers

1. Mastering Composition and Framing Techniques in Professional Real Estate Photography

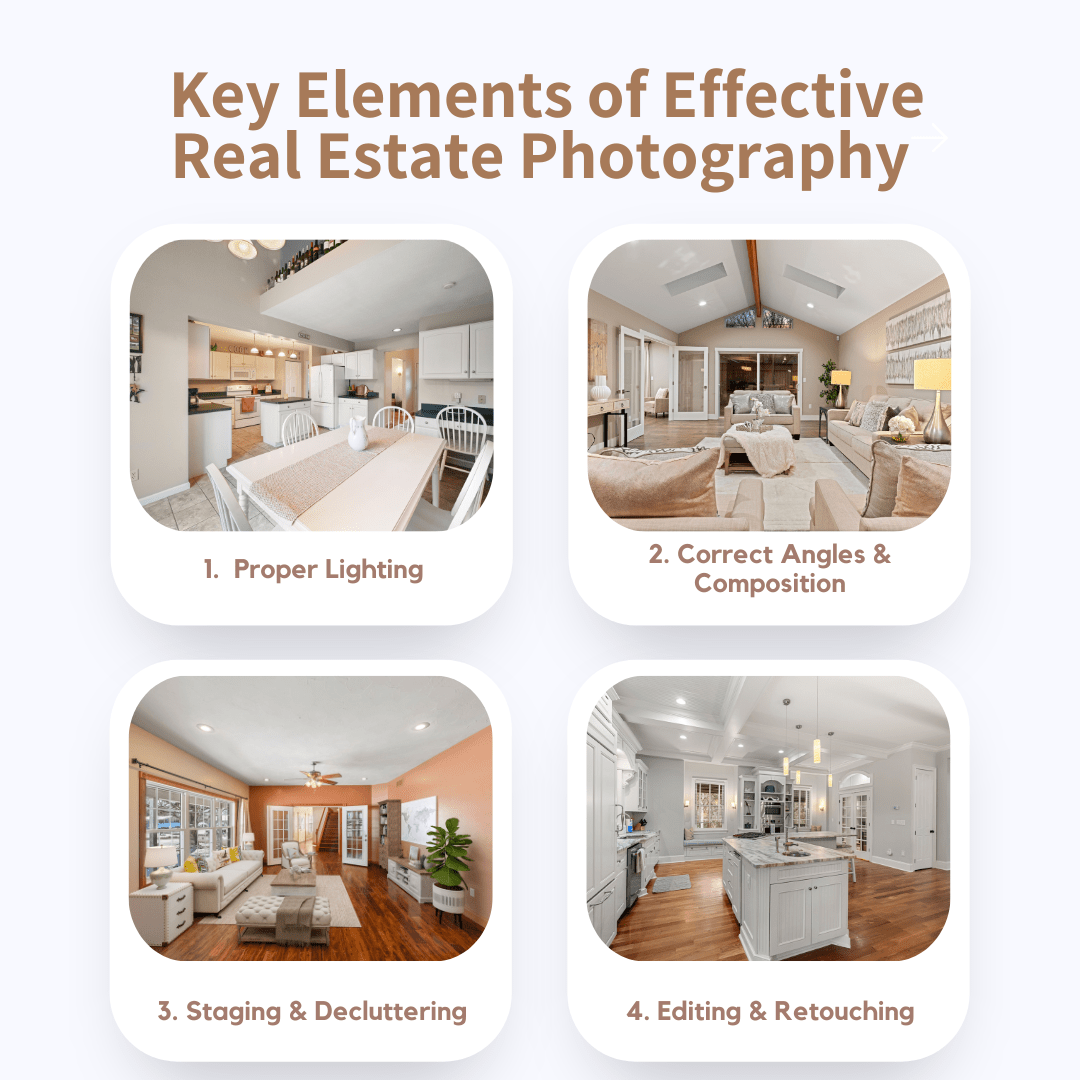
Skilled photographers employ a myriad of techniques such as composition and framing to accentuate a property’s most appealing features. By meticulously considering angles, perspectives, and framing, they showcase each space’s layout and flow in real estate agent photoshoots.

2. Optimizing Lighting Strategies for Professional Real Estate Photography

Quality lighting is crucial for exceptional real estate photos. Experts skillfully use natural light, artificial illumination, and reflectors to achieve balanced, well-lit images that showcase a property’s features. Prioritizing lighting in real estate photography services enhances property appeal, attracting more potential buyers.

3. Crafting Positive First Impressions Through High-Quality Images in Professional Real Estate Photography

Professional real estate photography services utilize Adobe Lightroom and Photoshop to refine imagery, adjusting exposure, color balance, and sharpness. This meticulous post-processing ensures high-quality images accurately representing properties, setting real estate agent photos apart and contributing to their effectiveness in attracting buyers.

The image changed completely using the real estate photography editing

4. Utilization of Specialized Equipment

Investment in specialized equipment, including wide-angle lenses, tripods, and external flashes, is instrumental in achieving exemplary real estate photography services. These tools enable photographers to consistently deliver qualified-grade results across their portfolio.

IV. Case Studies: Illustrative Examples of Professional Real Estate Photography

1. Enhancing Real Estate Imagery Through Post-Processing

Real-life case studies serve as compelling demonstrations of the transformative power of professional real estate photography. By juxtaposing before-and-after photos, the enhancement of a property’s appeal through expert imagery becomes palpable.

Real Estate Imagery Through Post-Processing

2. Demonstrating the Impact of Professional Photography on Sales

Through tangible examples, case studies underscore the tangible benefits of investing in professional real estate photography. Properties showcased with practiced photos not only attract more inquiries but also witness accelerated sale timelines and command premium prices, maximizing returns for sellers.

3. Testimonials from Real Estate Agents and Sellers

Moreover, testimonials from industry experts and satisfied clients validate the pivotal role of professional real estate photography in driving sales. They underscore the value of high-quality imagery in effectively marketing properties and achieving optimal outcomes.

V. How To Choose The Right Gear For Professional Real Estate Photography

The Essential Gears For Professional Real Estate Photography

1. Choosing the Right Gear: DSLR vs. Mirrorless Cameras in Professional Real Estate Photography

When it comes to capturing stunning real estate photos, the choice of camera plays a crucial role. DSLR cameras offer versatility and high image quality, making them a popular choice among professional photographers. Mirrorless cameras, on the other hand, are more compact and lightweight, making them ideal for on-the-go shooting. 

2. Navigating Lighting Equipment Options: Flash vs. Continuous Lighting in Professional Real Estate Photography

The right lens can make all the difference in real estate photography. 

  • Wide-angle lenses are commonly used to capture expansive interior spaces and highlight key features of a property. 
  • Standard lenses offer a more natural perspective, ideal for showcasing individual rooms or details. 
  • Telephoto lenses can be useful for capturing distant views or for emphasizing specific elements of a property.

3. Navigating Lighting Equipment Options: Flash vs. Continuous Lighting in Professional Real Estate Photography

Proper lighting occupies a significant position in creating captivating real estate photos. While natural light can often produce beautiful results, it’s not always reliable, especially in interior spaces. At that time, flash photography can help fill in shadows and add brightness to dimly lit areas. Continuous lighting provides consistent illumination and is ideal for controlling the mood and ambiance of a space.

4. Which Are Accessories Useful For Real Estate Photography: Tripods, Filters, and Remote Shutter Releases?

In addition to a camera and lenses, certain accessories can enhance the quality of real estate photos. A sturdy tripod is essential for maintaining stability and reducing camera shake, particularly in low-light conditions. Additionally, filters, such as polarizers or neutral density filters, can help control reflections and exposure. Remote shutter releases allow photographers to capture images without touching the camera, minimizing the risk of blurriness.

The essential accessories will support you to get the best real estate photography

Final Thoughts

In conclusion, expert real estate photography is pivotal for sales success. By using captivating imagery and effective techniques, specialists can boost buyer interest and transactions. Investment in photography is a strategic move, yielding expedited sales and profitability. As real estate evolves, demand for proficient services grows. Partnering with BEATCOLOR enhances image quality. With advanced technology, they optimize images, ensure reflect a property’s beauty and attract buyers.

Read more:
5 Blow-Mind Tips For Stunning Interior Real Estate Photos
Real Estate Photography: The Best Tips For Preparing For Shooting Real Estate Photos
Real Estate Photography: A Definition Of Real Estate Photos? 

5 Mind-Blowing Tips for Stunning Interior Real Estate Photos

There are two types of real estate photography which are exterior photography and interior photography. Each type has certain needs to be shown up at its best. Yet it is well acknowledged among photographers that interior photography requires more advanced techniques and skill. 

In this article today, let’s dive into 5 advice to capture appealing interior shots!

1: Prepare Real Estate Photography Gear 

How would you ever shoot a picture without photographic equipment? Therefore, purchasing the appropriate gear should be your priority.

Lens: It is recommended to use a wide-angle lens (24 mm equivalent or wider). Instead of only capturing a portion of one wall, a wide-angle lens allows you to capture the entire space. 

Tripods: A tripod is a must-have for every real estate photographer in the war against blurred photos. The tripod lets you make long exposures so you can use small apertures for sharp focus and use slow ISOs for clean images.

Camera: As a newbie, if you’re not sure which camera to acquire, it’s preferable to start with an entry-level model to test first and then upgrade to a better one later on. Refer my recommend list as below:  

gear-interior-real-estate-photos

2: Choose Enhancing Shooting Angles

Without a correct shooting angle, interior shots may fail to tell a story. Choosing unique perspectives is the greatest option if you want to add interest and drama to your real estate images. Spend some time moving about, observing angles that seem right, and trying to locate angels that can depict many rooms. Your photos will have depth and space as a result.

interior-real-estate-photography

But keep in mind that your goal is to sell the house’s essential components, not to flaunt your belongings or furnishings. When in doubt, choose for perspectives that highlight your home’s architectural features rather than your furnishings.

3: Clean Interior Rooms

Imagine you are looking for a house, will you choose a messy space or a clean room?  The answer is obvious. Before the photographing day, spend some of your time checking all the rooms to make sure they look tidy and organized. Make sure desks, counters, and other flat surfaces are finished and free of debris. Anything which destroys the value of the house such as dirty dishes, repaired air-conditional should all be tucked away and out of sight. After doing some touch-ups, your home will be more appealing and clickable than before. Look at the below photographs to see how worth it is!

interior-shooting-tips

4: Focus on Lighting

For an interior photo, natural daylight will be the best lighting source. It can be a little challenging to determine when to acquire the greatest light for your needs, though. It will assist in creating a cozy, lived-in atmosphere in the morning. 

On the other hand, think about evening hours if you want a comfortable, solemn, or romantic atmosphere. If the light is not as perfect as you had hoped, you can also attempt to use HDR photography by taking multiple images (usually three or more) at various exposures to get the darkest image (-2 EV), the correctly exposed image (EV), and the overexposed image (+2 EV). Photomatix Pro 5.0 can then be used to combine the three images into a single image. Once combined, the photos will produce a new image. Once combined, the photos will produce a new image that fully utilizes the dynamic range of the originals.

Finally, remember to use the light available indoors by turning on every light. Accent lighting and a cozy, lived-in atmosphere are produced by placing interior lights throughout the room, which will increase its appeal.

5: Take Care Perspective Correction

What most novice photographers have in common, though, is that they usually don’t have verticals for their real estate and architecture photos. The truth is that verticals are not given as much consideration by photographers. Verticals must, however, line up with the left and right edges of the frame. Here’s a quick tip for creating vertical lines for nice interior real estate photos:

  • Make sure the camera is 100% level. 
  • A good tripod will have a bubble level.
  • Shooting with a level camera will straighten the vertical lines in the frame and make the resulting photo more pleasing to look at.

Final Thoughts

To sum up, becoming a real estate photographer is a hard-won journey, not for a little while. I hope that our article today with simple tips is helpful and helps you get more beautiful interior real estate photos. In case you have any concerns and need our help, do not hesitate to contact us!

How To Build Client Trust with Real Estate Photos? (Top 6 Tips)

Having a solid portfolio is crucial if you want to succeed in the real estate photography industry. A strong portfolio allows prospective clients to see your outstanding work and gets a sense of your abilities and working style. Whether you are a novice or an experienced real estate photographer with years of expertise in the field, formulating a portfolio is the key to unlocking the door to your future success.

Tip 1: Real Estate Photography Portfolio

Establishing a website or social media page devoted to your real estate photography endeavors is the first step toward building a robust portfolio. In a digital world, it is not optional anymore but a must. High-quality real estate photos of your best work should be included on this user-friendly internet platform. Make sure you arrange your pictures logically, perhaps by type of property or region. Another option would be to print out your portfolio and carry it with you to client appointments. This might be an excellent method to present your work memorably and tangibly.

Tip 2: High-quality equipment

For any real estate photographer, investing in top-notch equipment is crucial. Look into the newest lighting and camera gear, then make the finest purchase you can afford. To make sure you are getting the most out of your equipment, take the time to learn how to use it correctly. Keeping up with real estate photography trends and the newest technological advancements will help you stand out in a crowded market and maintain your competitiveness with other opponents.

Tip 3: Communication 

Another unskippable  tip of making a great impression on real estate broker or agent is communication skill. 

  • Response questions,  inquiries and even complaints from clients promtly and professsionally. 
  • Give precise and comprehensive information about your costs, deadlines, and deliverables. 
  • Follow up the process with clients frequently to let them know about any adjustments or modifications. 

Thanks to being communicative and responsive, you can step-by-step establish a solid reputation for dependability and professionalism. 

Tip 4: Excellent Customer Service

Offering top-notch customer sservice  is the next crucial thing of creating your footprint in this competitive industry. In all of your dealings with clients, always stay polite, professional, and positive . Be responsible, on time, and show flexibility and accommodation when needed. After the session, get in touch with the clients to make sure they are happy with the work you did.  Set a goal to deliver clientes exceptional customer service will help you develop a loyal customers system and encourage favorable word-of-mouth recommendations.

Tip 5: Clients Testimonials

The fifth tip, your reputation can be boosted significantly through positive reviews and testimonials. Ask satisfied clients to leave a feedback on your website or social media profile. Respond to any negative reviews professionally and respectfully to prove with tem that you take their reviews strictly. Use client testimonials in your marketing materials to showcase your reputation and build trust with potential clients.

Tip 6: Earning Trust Through Consistency

Last but not least, branding management is paramount. , Besides high-quality and consistent real estate photos, you can reassure prospective clients that you’re a trustworthy and reliable agency to deal with rather than just a flash in the pan by presenting your brand constantly through high-end and consistent products and several social platforms as well.

Final Thoughts

I hope that my aforementioned suggestions for building client trust with real estate photos are helpful and give you some ideas. “Slow and steady wins the race.” That’s why please just do step by step towards your goal, gradually conquer your clients by your talent and dedication. 

Looking to 10x your photography business or get some backend support? Follow us and learn more about our photographer network.