Learning how to edit real estate photos is crucial for creating captivating and professional-looking property images. High-quality edited photos can significantly impact how potential buyers perceive a property, leading to quicker sales and higher offers. This guide will take you through key techniques for real estate photography editing, providing tips and recommendations for enhancing your images.
1. Organize and Select the Best Photos to Edit Real Estate Photos
Before you edit real estate photos, start by selecting the best images to work with. This process is essential for creating professional-quality visuals and saves time during editing. Follow these steps to ensure you’re working with photos that highlight the property’s key features.
a. Review All the Photos Taken During the Shoot
Carefully review each photo from the shoot, focusing on images that showcase important areas like living spaces, kitchens, and outdoor views. Eliminate any photos that are blurry or poorly composed to streamline your editing workflow. This selection process ensures you’re editing only the best images, making real estate photography editing more efficient.
b. Group Photos by Category
Once you’ve chosen the top photos, organize them into categories such as interiors, exteriors, and detail shots. Grouping images by category helps maintain consistency in your edits, ensuring a balanced representation of the property.
c. Backup the Original Photos
Before making any edits, create a backup of the original files. This precaution ensures you always have the unaltered photos to fall back on if needed, allowing for greater flexibility. Keeping the original images safe also enables you to compare your edited versions with the unedited ones to assess your improvements.
2. Basic Editing Steps: Enhancing Brightness, Contrast, and Correcting Distortion in Real Estate Photos
Start by making essential adjustments to improve the overall quality of your photos. These foundational edits help to present the property in a more appealing and professional manner.
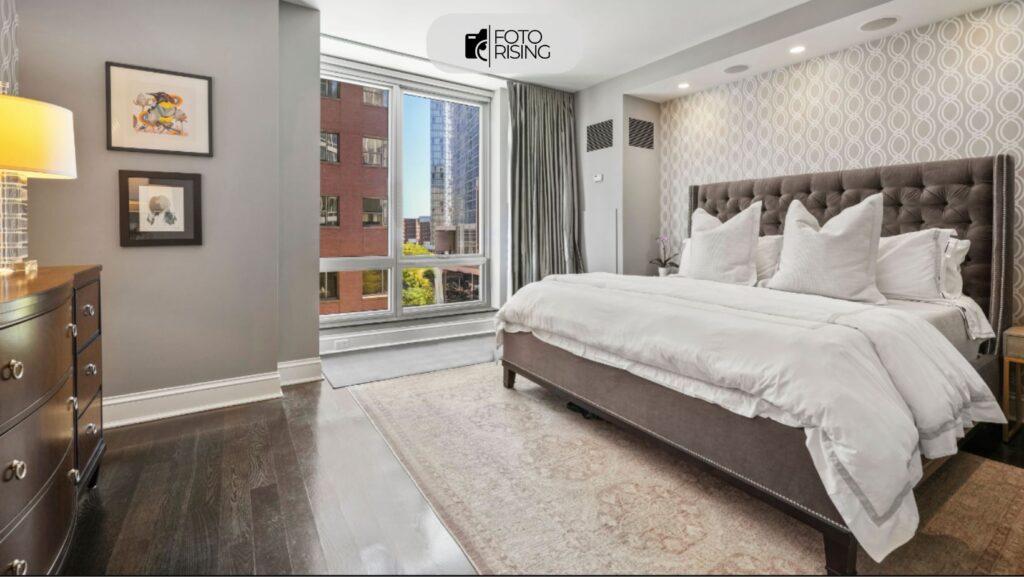
a. Basic Edits: Brightness, Contrast, and Color Correction
Enhancing brightness makes a room feel larger and more inviting, but avoid overexposure, which can cause details to be lost. Increasing contrast adds depth by emphasizing the differences between lighter and darker areas, bringing out textures and architectural elements. Finally, correcting the white balance ensures colors appear natural and true to life, especially under artificial lighting, to avoid color casts that may distort the room’s appearance.
b. Correct Perspective Distortion
Wide-angle lenses, commonly used in real estate photography, can cause perspective distortion, making lines appear skewed. Fixing vertical lines helps maintain a realistic look, while aligning horizontal lines ensures the photo remains balanced and aesthetically pleasing.
c. Editing Software Recommendation
Popular software like Adobe Lightroom and Photoshop offer powerful tools for brightness, contrast, white balance, and perspective corrections. For budget-friendly alternatives, Luminar and Affinity Photo provide excellent features. Free programs like Darktable also offer sufficient editing tools to enhance real estate photos.
3. Advanced Techniques for Editing Real Estate Photos
To make your photos stand out, consider implementing some advanced editing techniques that can elevate the quality and appeal of your images.
a. Employ HDR (High Dynamic Range) for High-Contrast Scenes
Using HDR involves combining multiple exposures to balance lighting in photos with contrasting areas, such as rooms with large windows. This technique helps to capture details in both bright and dark areas, creating a more dynamic and visually interesting image. By enhancing the dynamic range, HDR ensures that every element of the scene is well-represented, making your real estate photos more inviting.
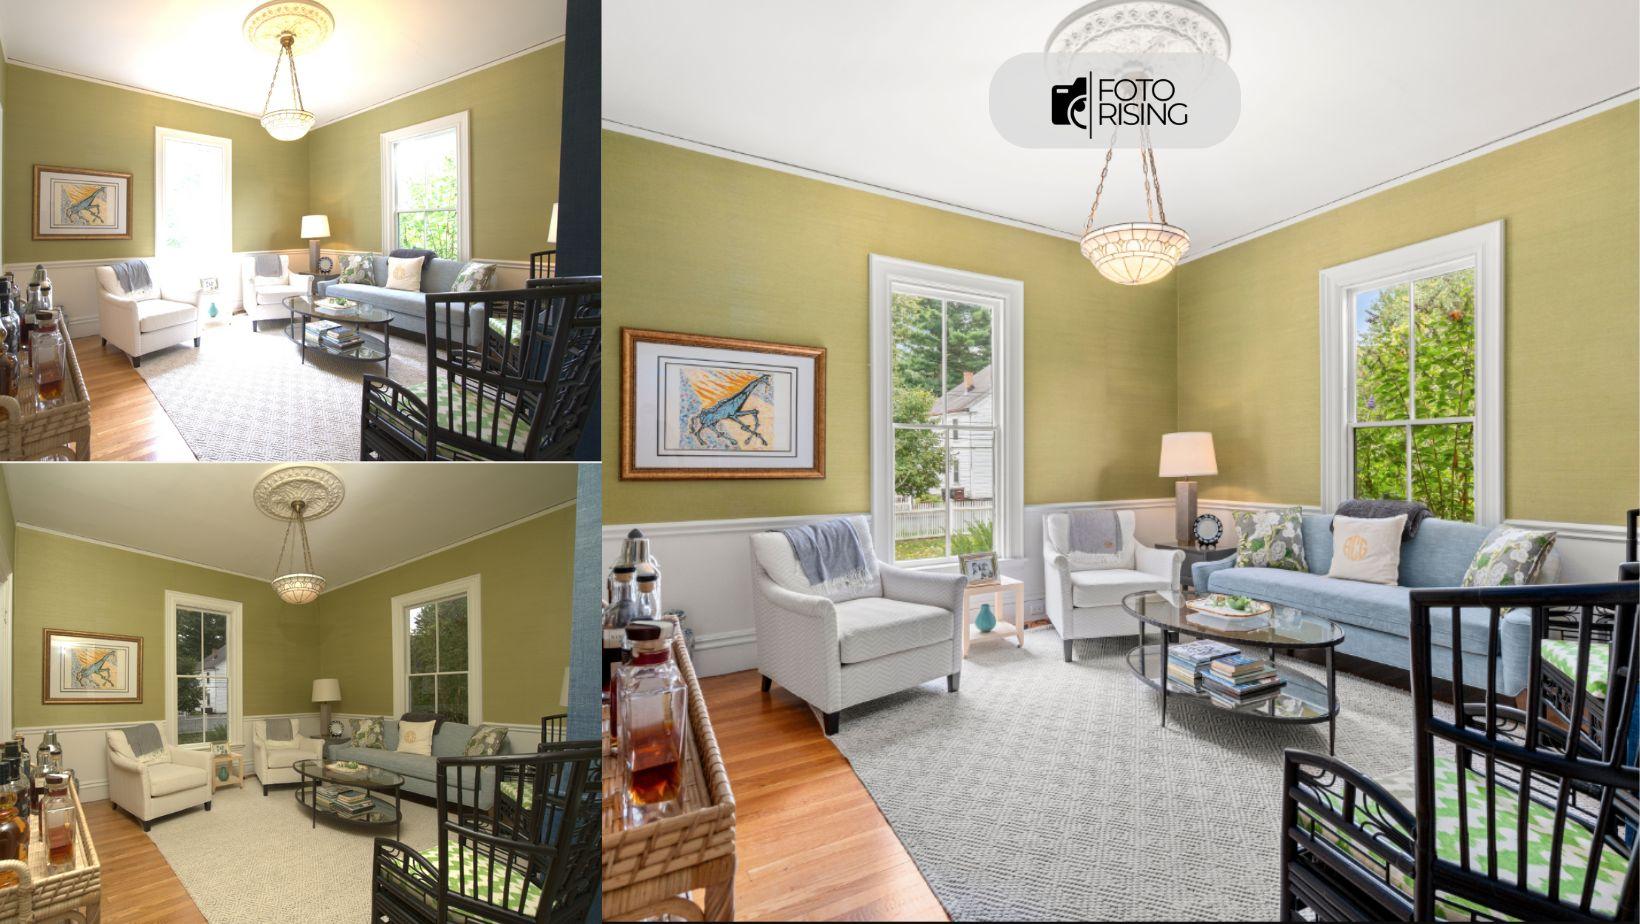
b. Retouching Objects
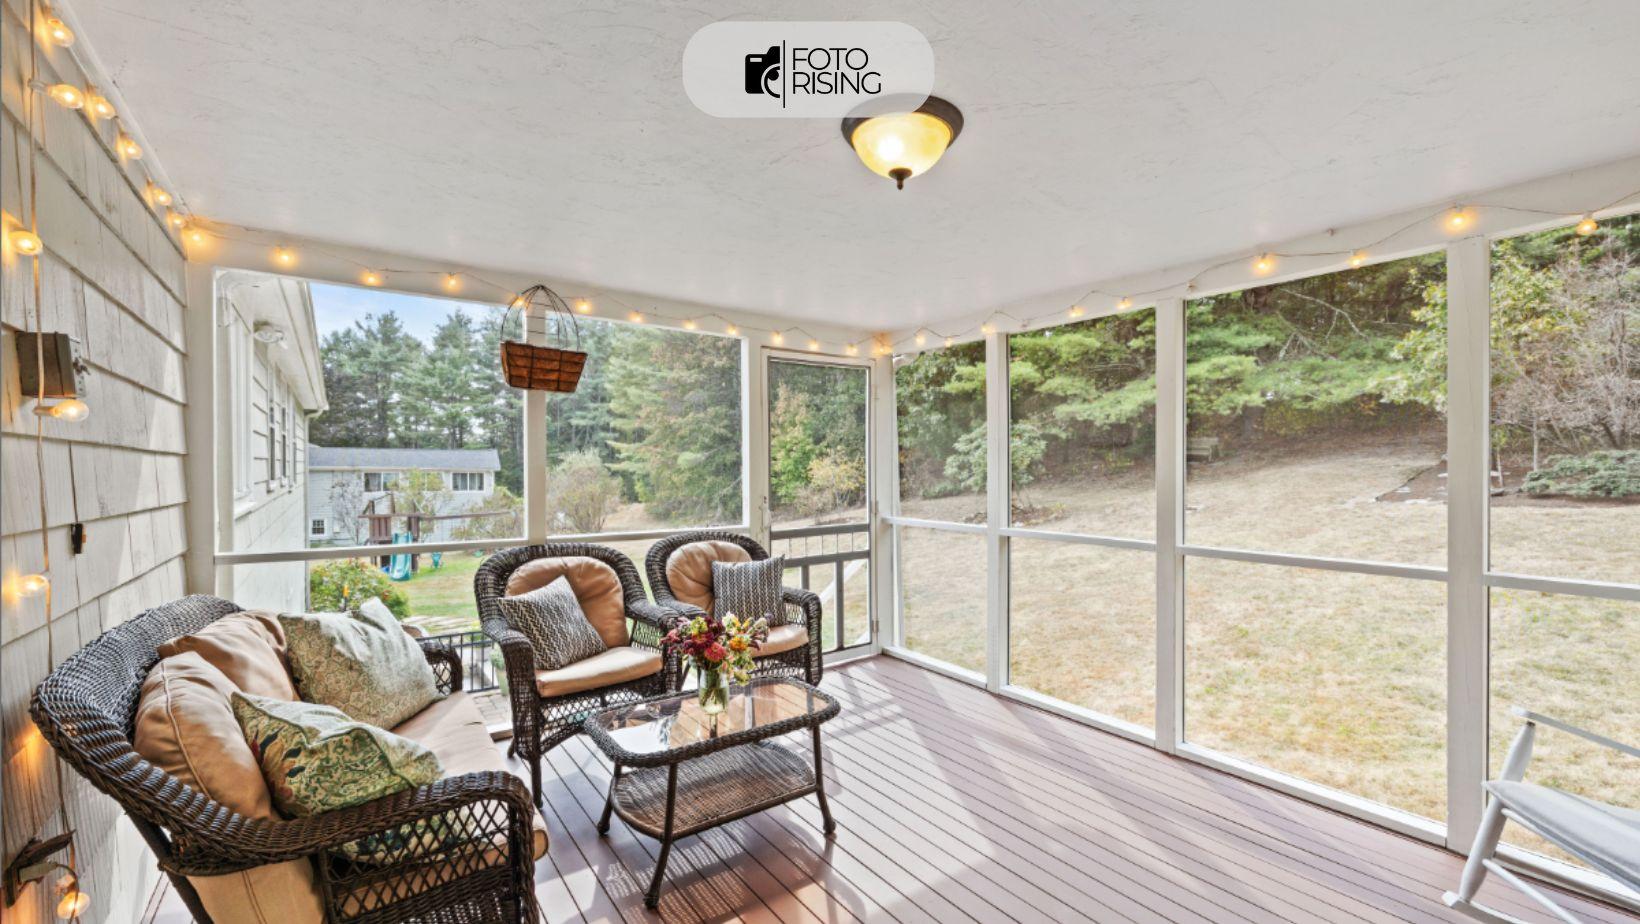
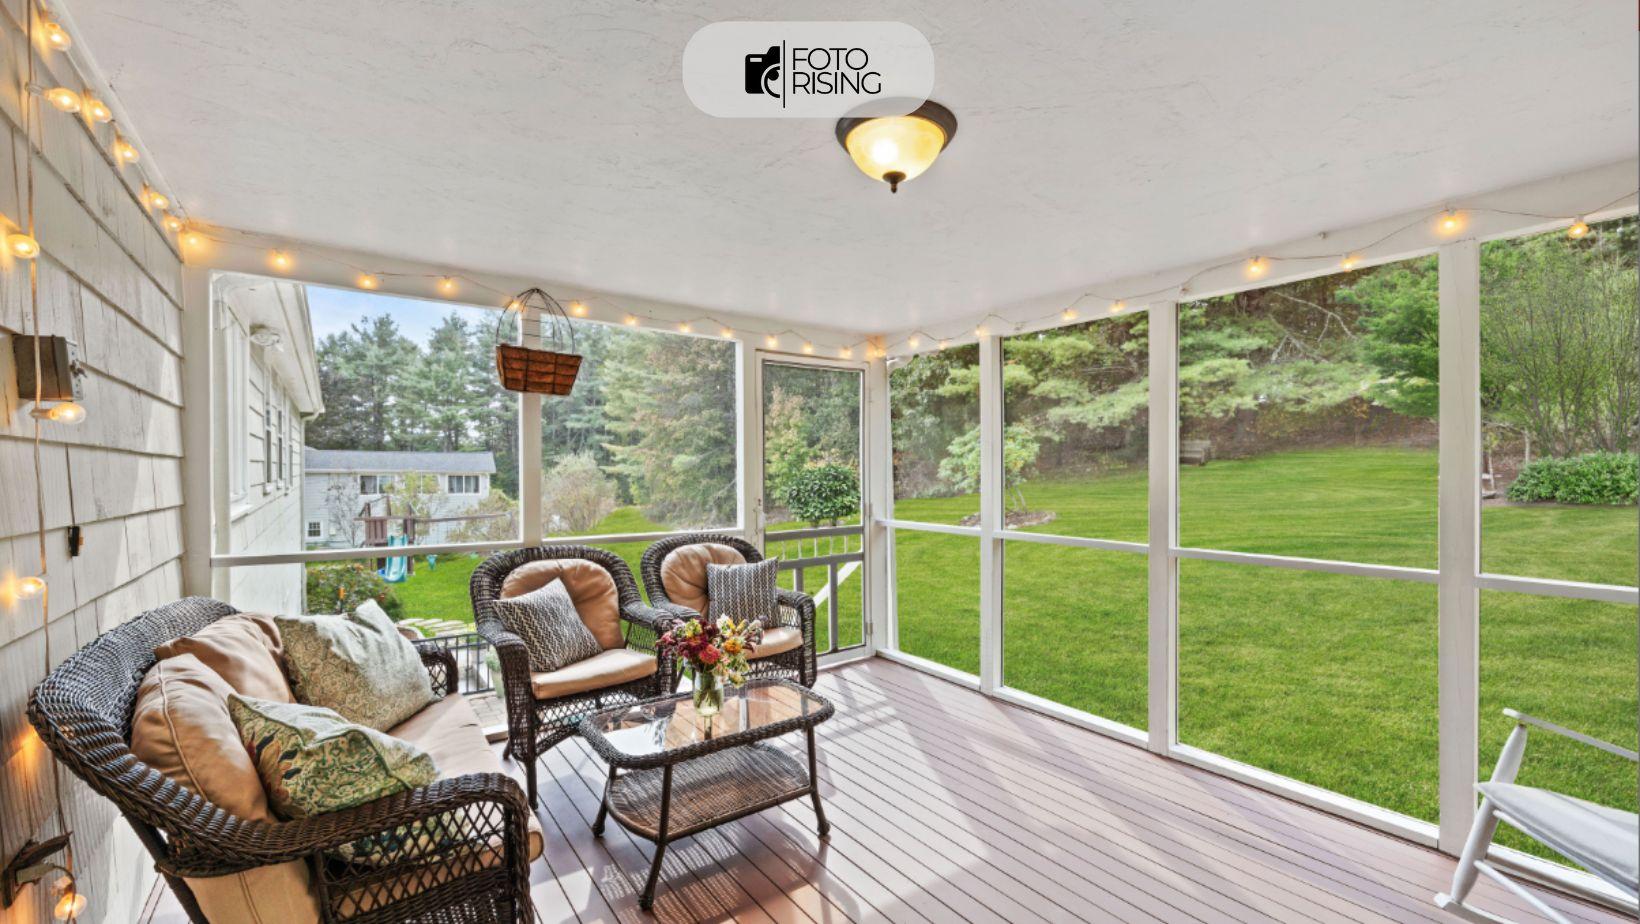
When you edit real estate photos, it’s crucial to retouch objects to create a polished look. Start by removing any unarranged items or clutter that may distract from the property’s features. Internal cord removal is essential for maintaining a clean aesthetic. For added warmth, turn on lights and replace TV screens to display appealing images. Additionally, consider enhancing outdoor areas by adding fire to fireplaces or fire pits, removing hoses or pool cleaners, and patching small lawn areas to make the grass appear greener.

Moreover, it’s important to remove any distracting elements such as sale yard signs, cars, leaves in the pool, stains on floors or driveways, and other small clutter. By addressing these details, you can transform your images and help potential buyers focus on the property itself, making it more appealing.
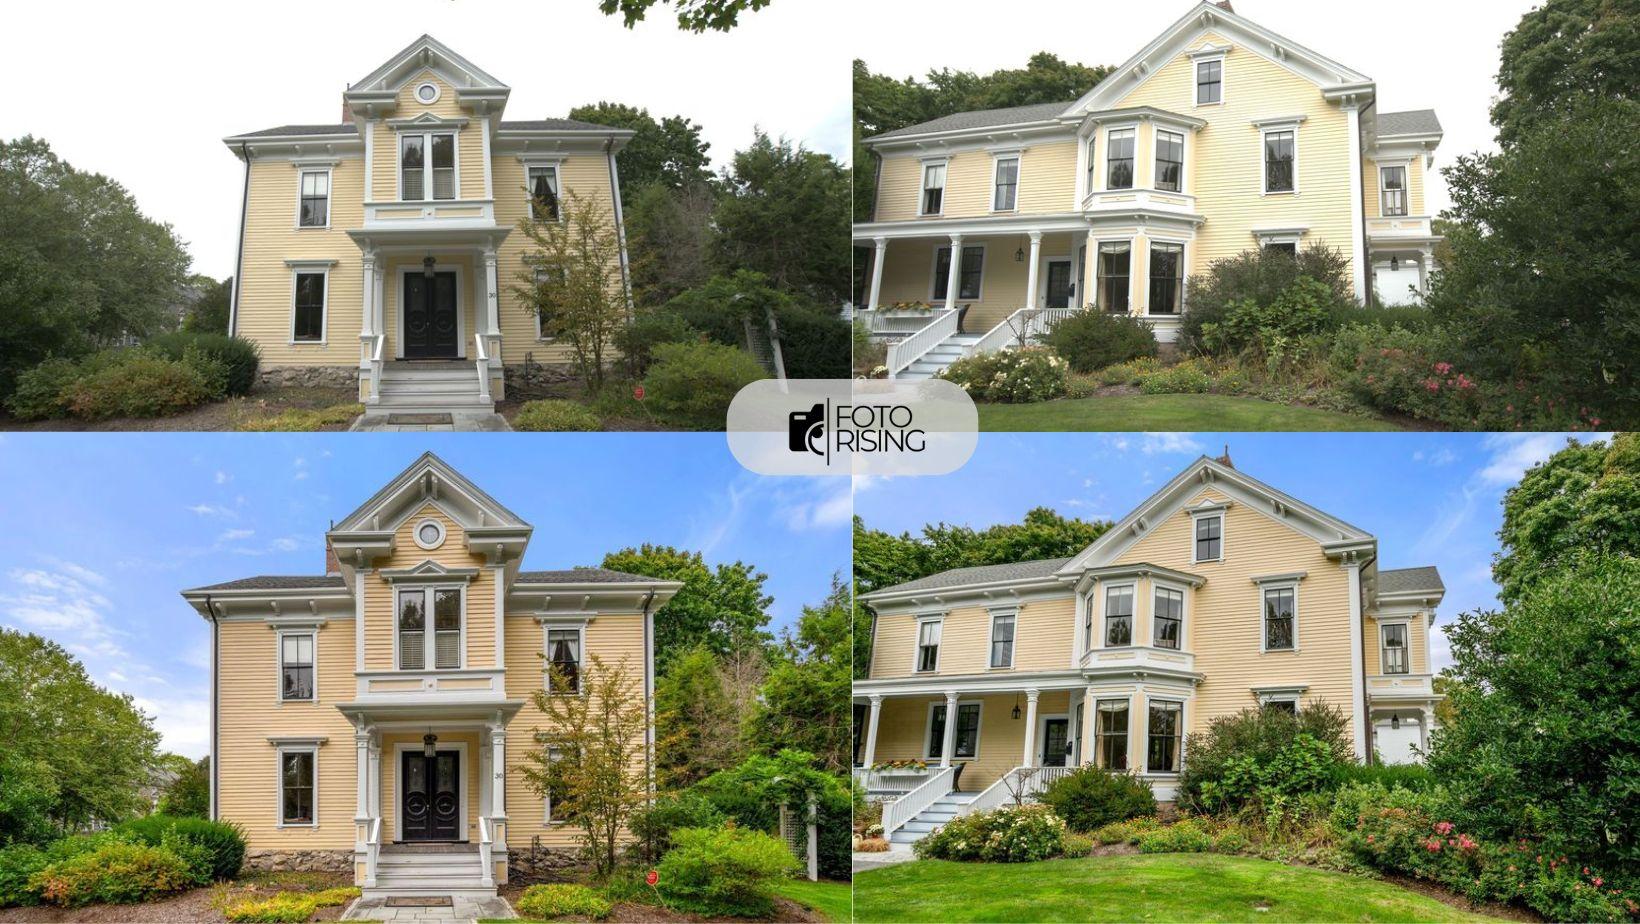
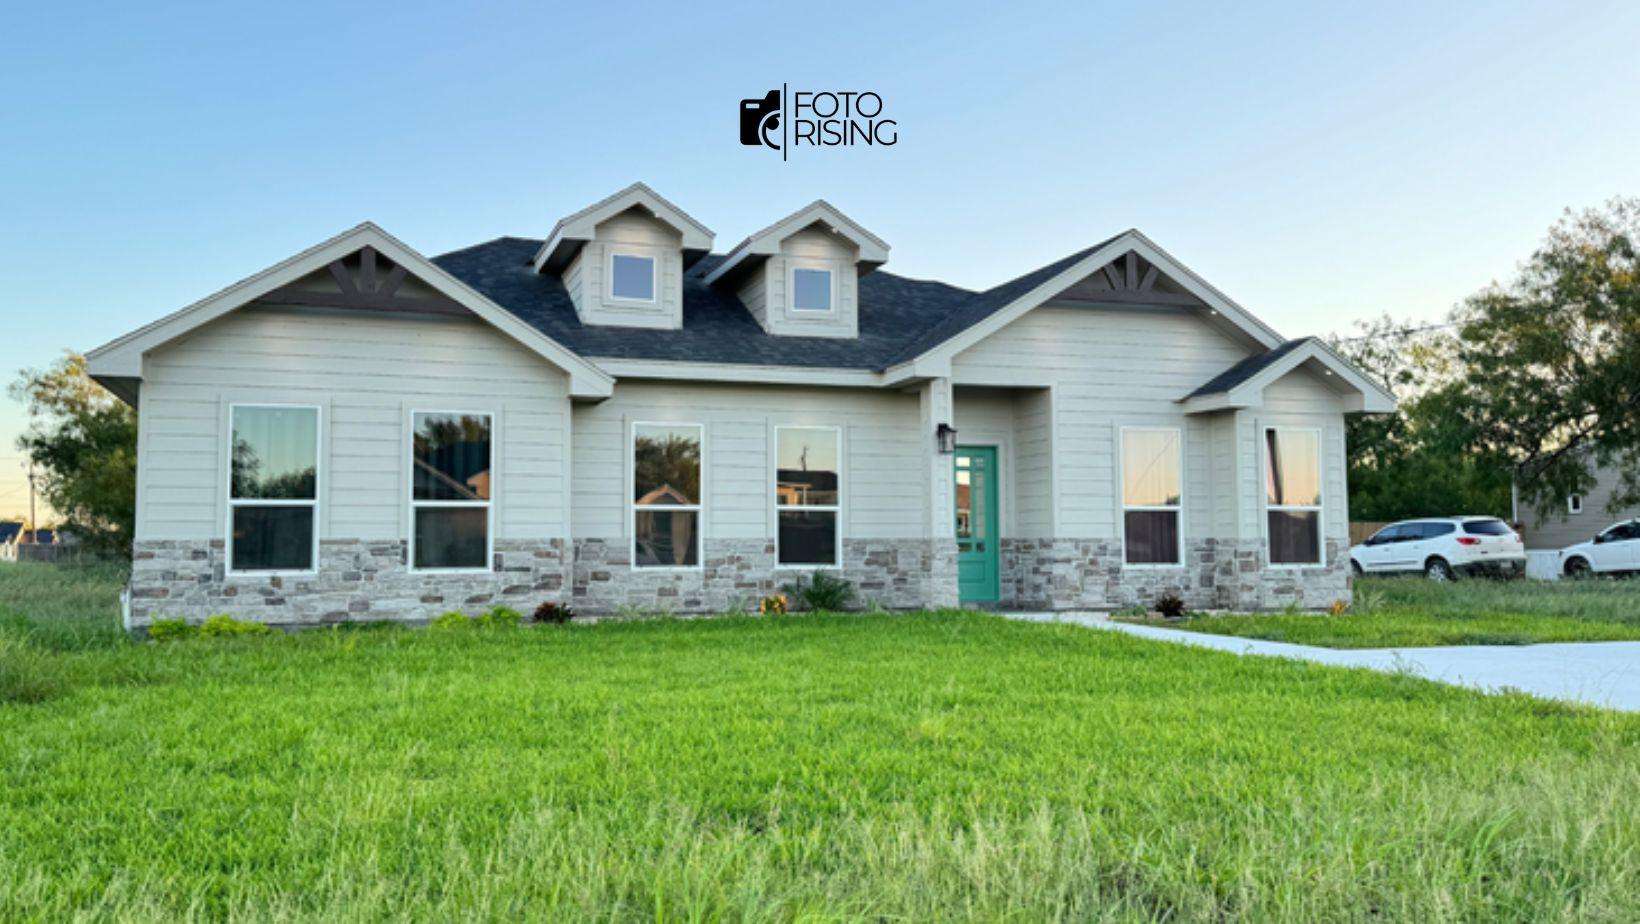
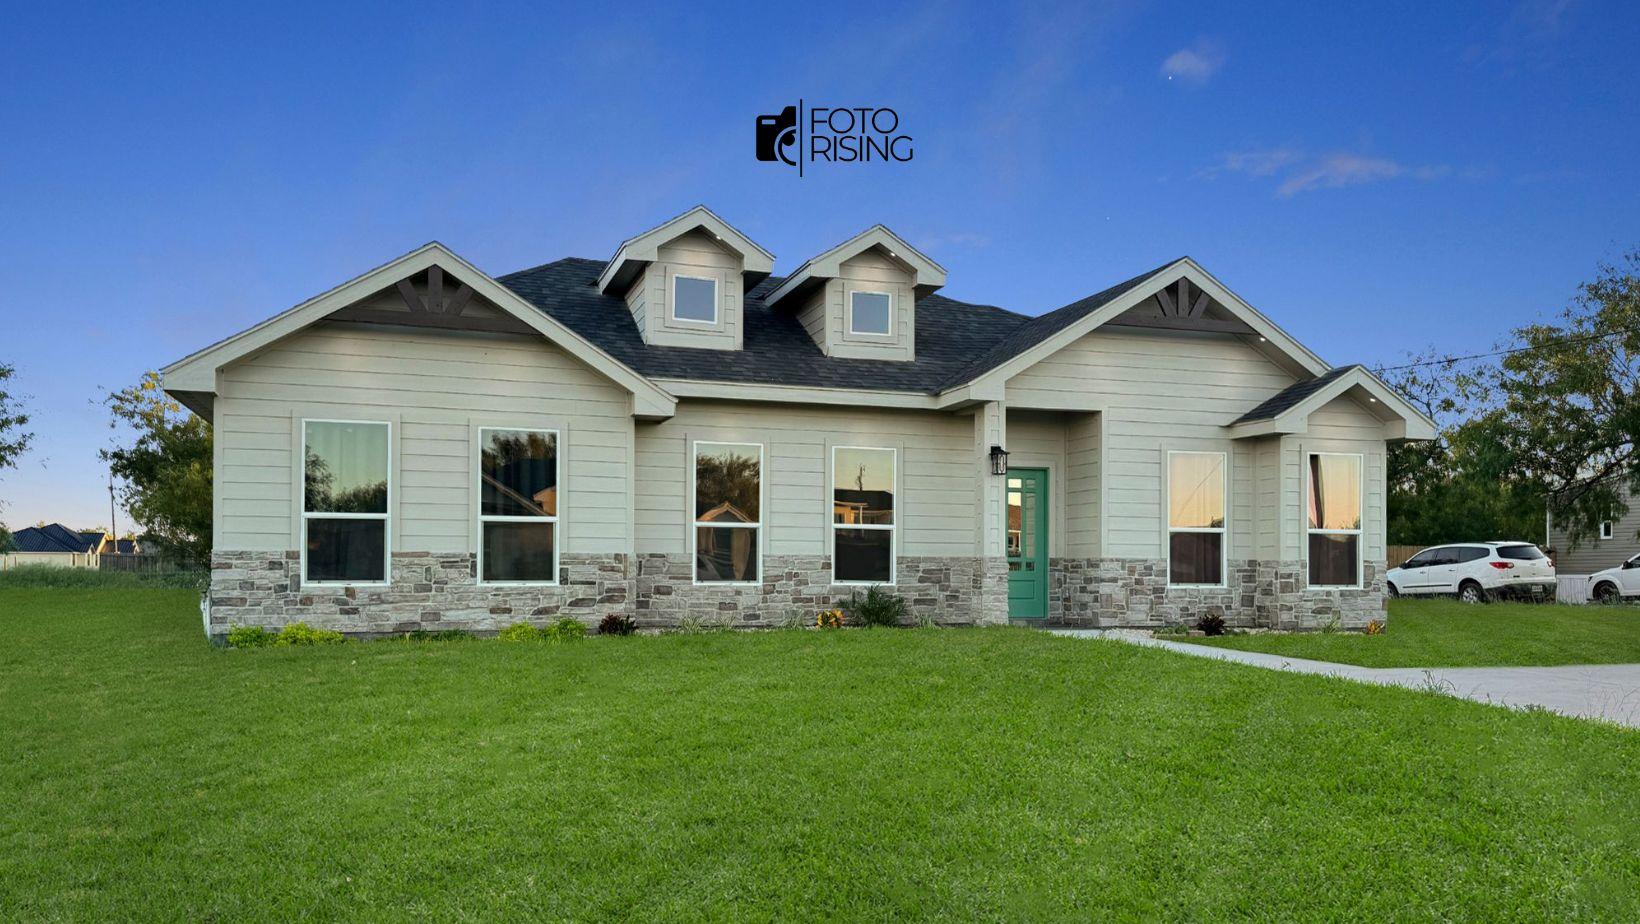
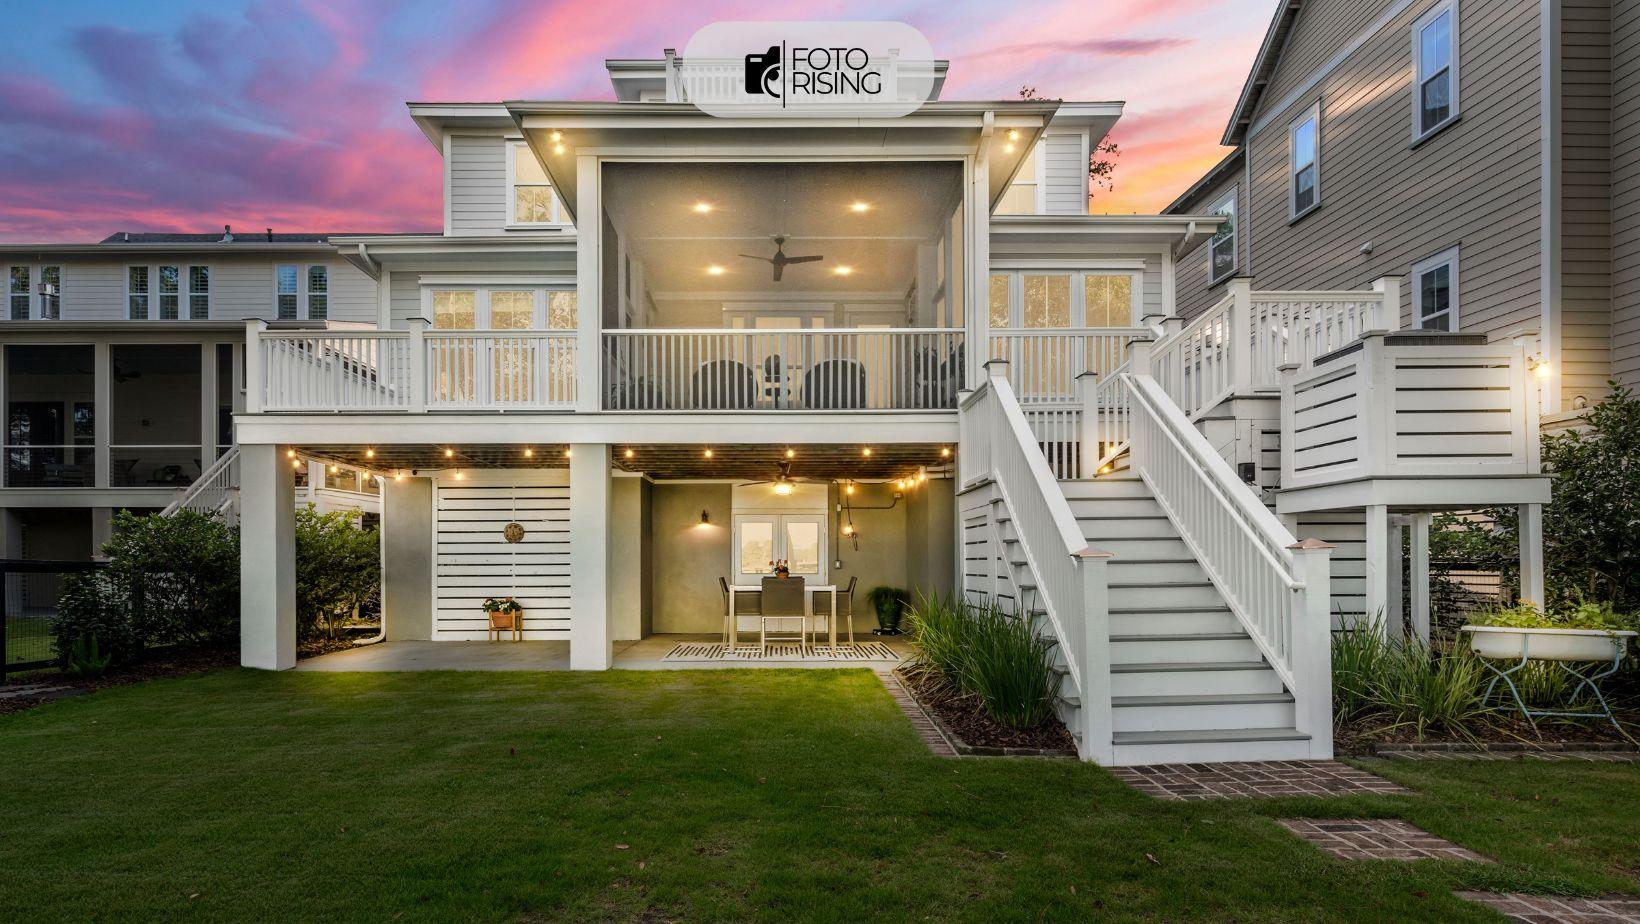
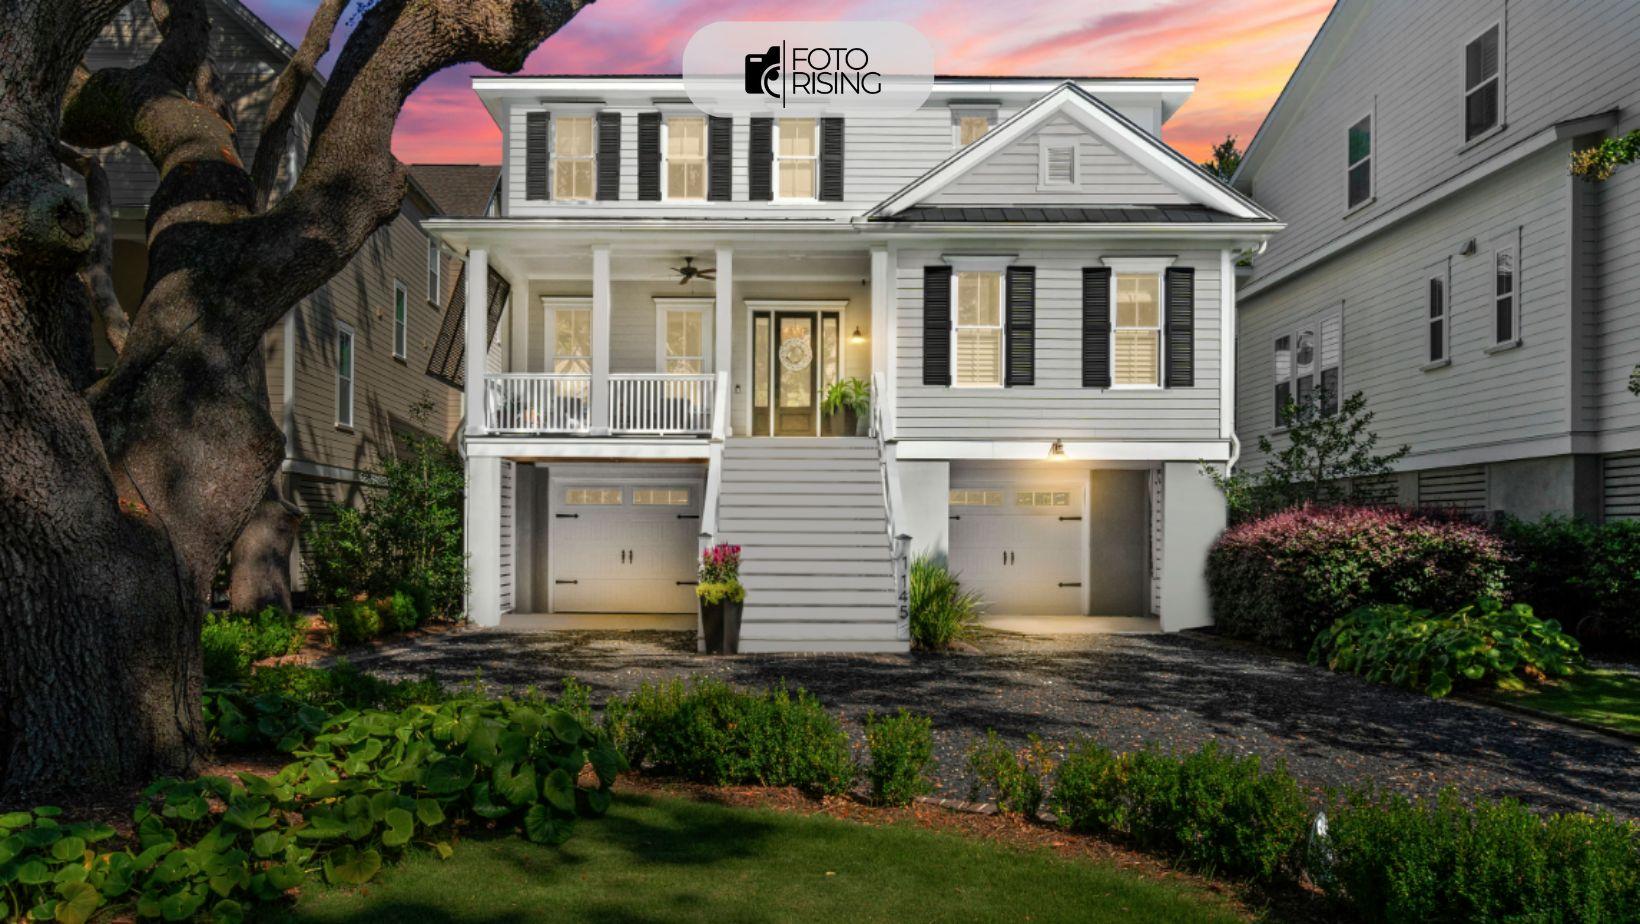
c. Virtual Dusk and Virtual Summer
Virtual dusk and virtual summer techniques allow you to manipulate lighting and ambiance to create more appealing exterior shots. By digitally adjusting the light to mimic a sunset or adding vibrant summer elements, you can significantly enhance the attractiveness of your images. This helps to evoke emotional responses from potential buyers, making them more likely to envision themselves in the property.
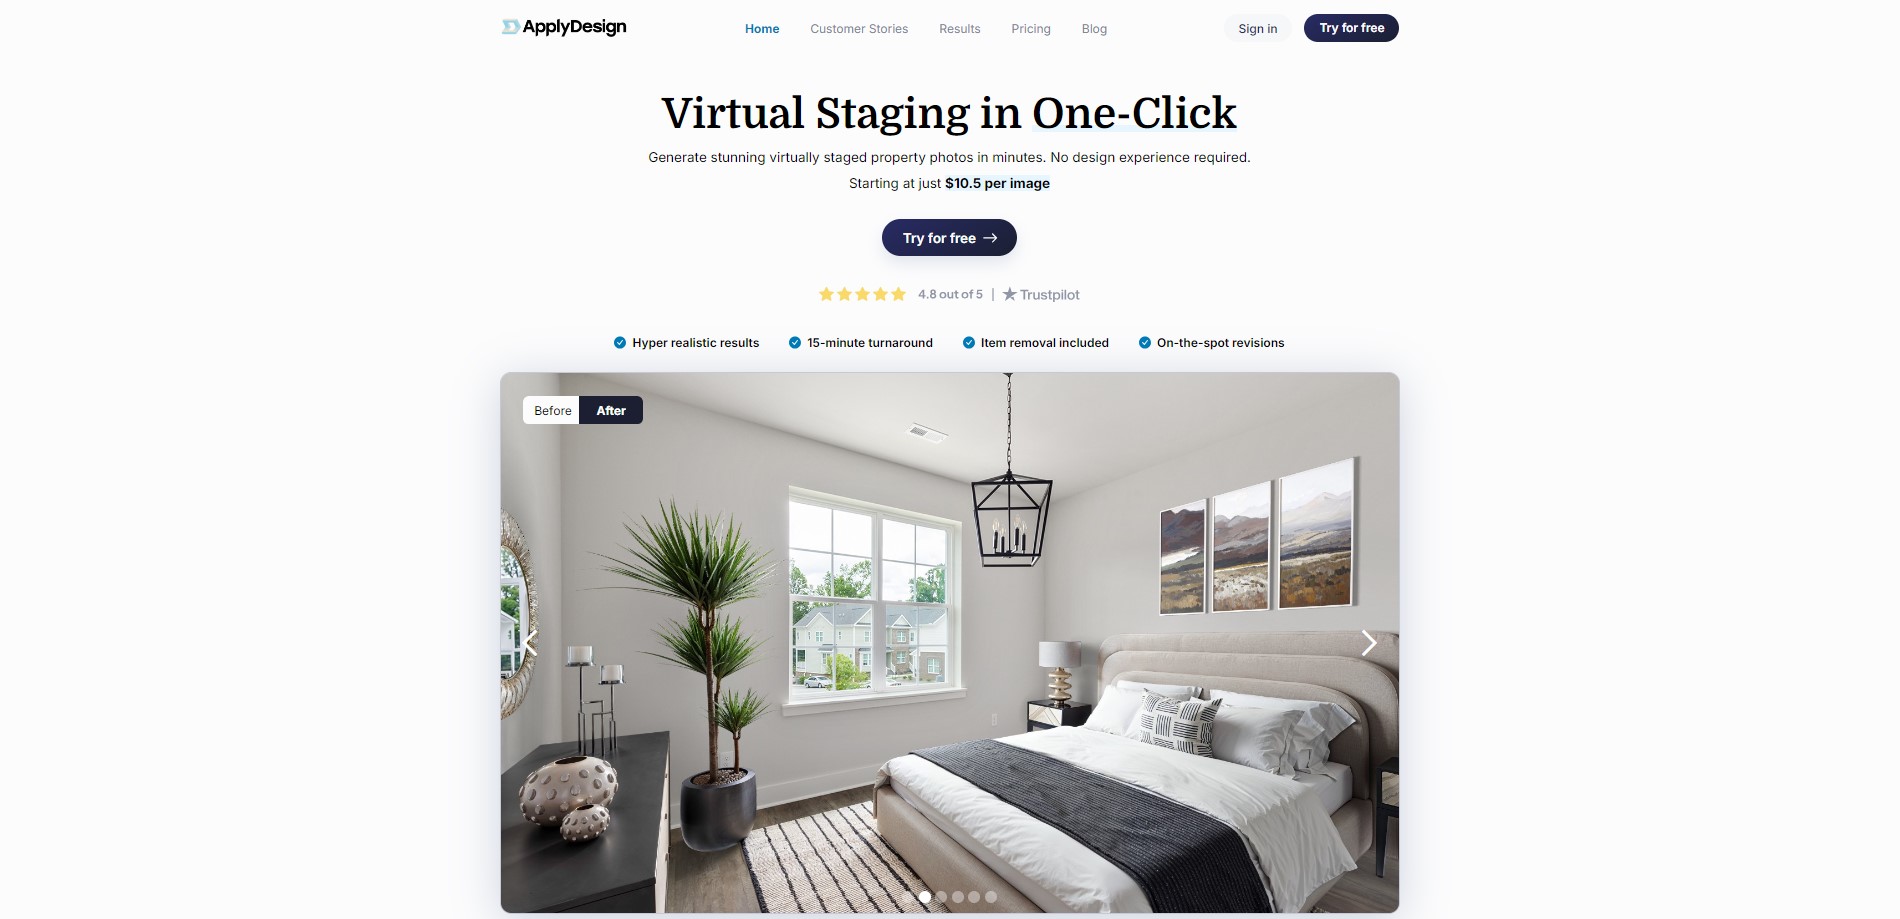
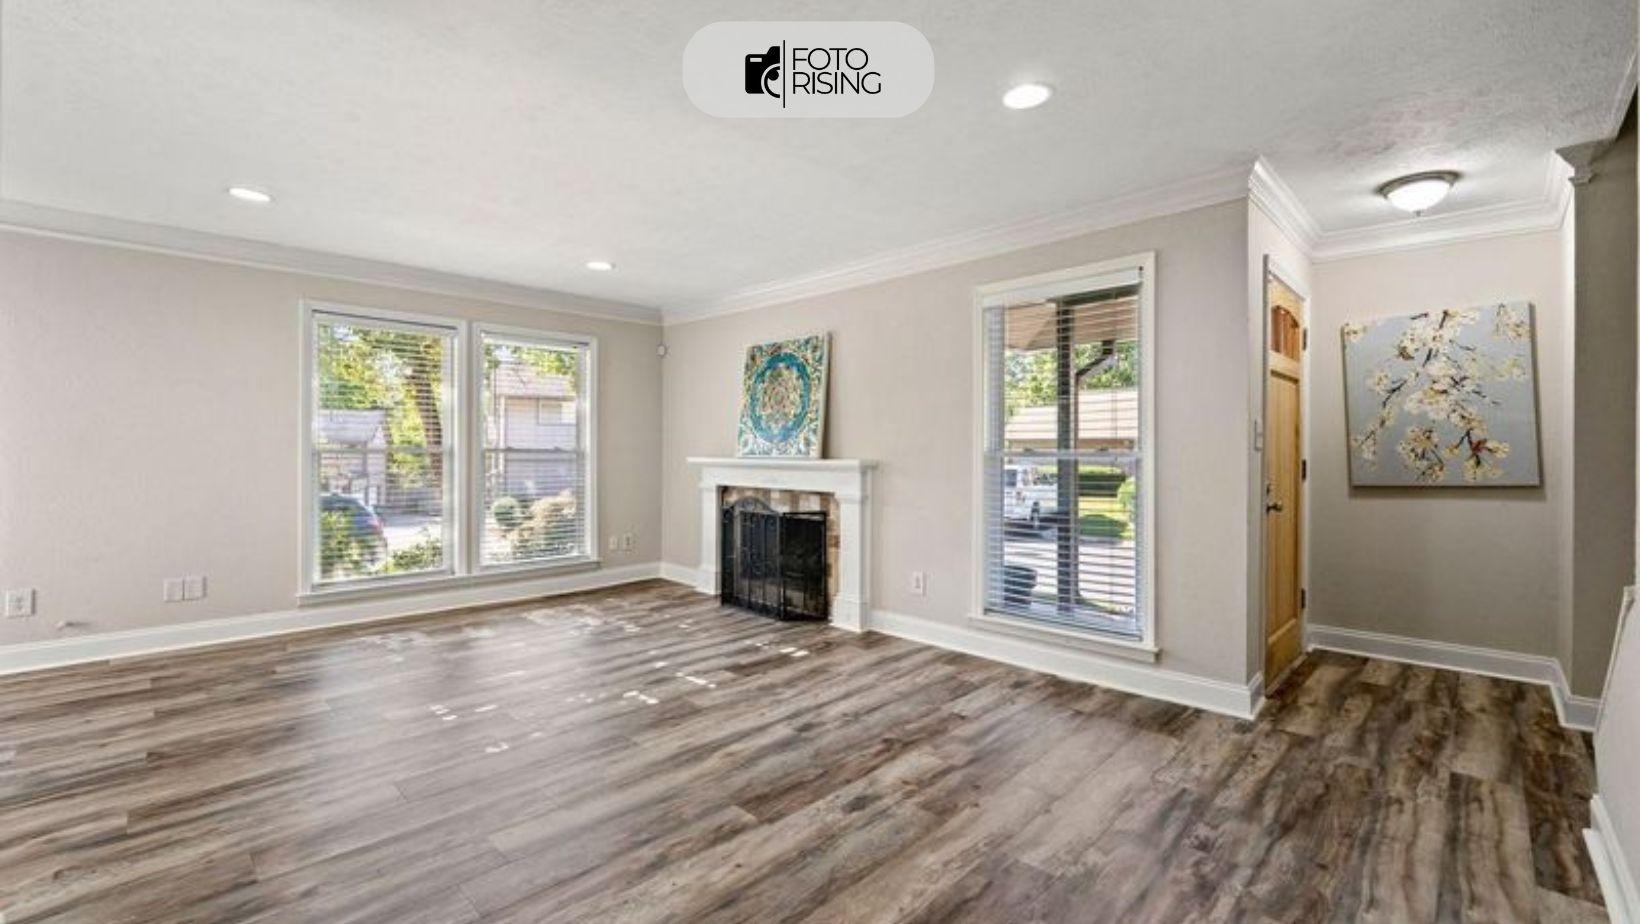
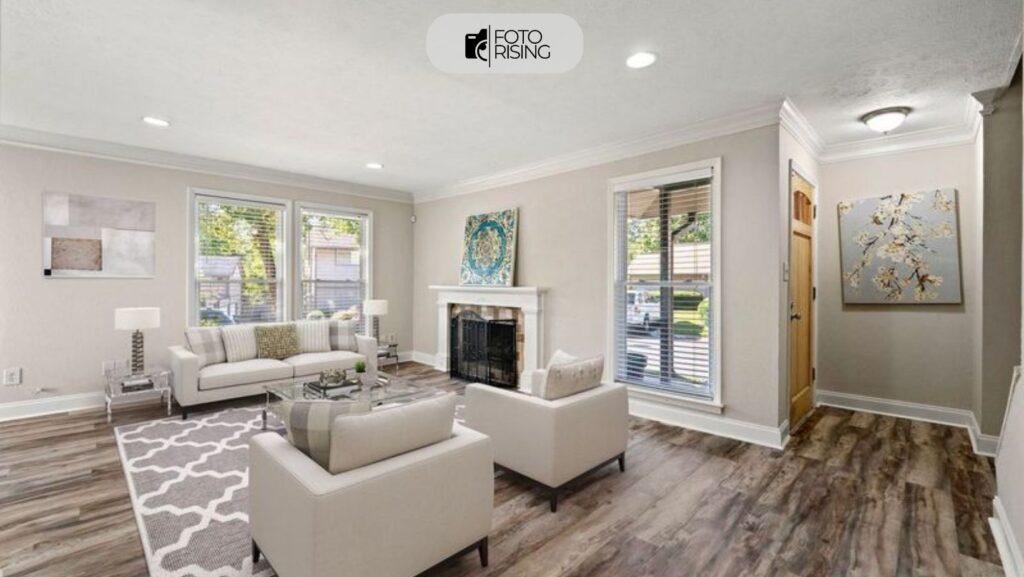
d. Virtual Staging
Virtual staging is a powerful tool that allows you to furnish and decorate a space digitally. By adding furniture, art, and decor to empty rooms, you can help potential buyers visualize the space’s potential. This technique can be especially useful in showcasing how rooms can be used, ultimately making the property more appealing.
Conclusion
Editing real estate photos is essential for creating images that attract potential buyers. By following these steps, you can transform your ordinary photos into eye-catching visuals that stand out in the market.
Related posts:
Mastering the Art: How to Edit Real Estate Photos in Lightroom?
The Popular Interior Furniture Style for Living Room in 2024
Top 5 Free AI Virtual Staging Tools to Upgrade Your Real Estate Photos