
Hit enter to search or ESC to close


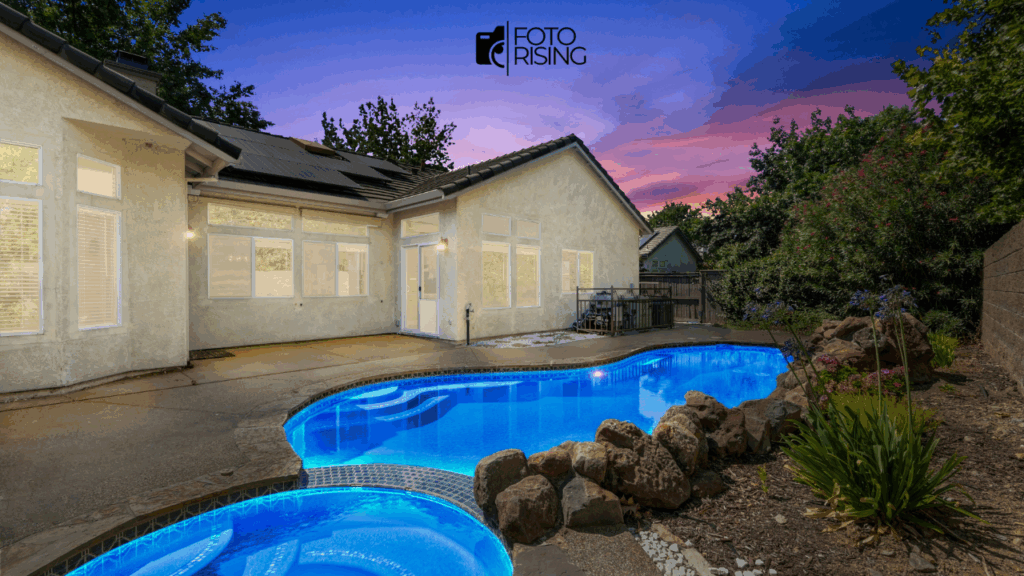
In real estate photography, exterior images play a crucial role in attracting potential buyers. However, a dull or overcast sky can dramatically reduce the visual appeal of even the most attractive property. The good news is that you can now make skies pop - without needing to use Photoshop. This guide will show you how to replace sky in Lightroom using its latest AI-based features, making your editing workflow faster and more effective.
Whether you're a real estate photographer, a photo editor, or a property agent managing images for listings, mastering this technique can significantly boost the quality and performance of your visuals.
Why Replace Sky in Real Estate Photography?
A vibrant, well-balanced sky can enhance the entire mood of a photo. Especially in real estate, visuals are not just decorative, but they sell.
By replacing or enhancing the sky in Lightroom, you can:
- Make properties appear more welcoming and appealing
- Add contrast between the building and the background
- Increase perceived property value
- Improve user engagement and click-through rates on listing websites
Additionally, replacing the sky in Lightroom allows editors and agencies to save time compared to exporting images to Photoshop.
Can You Really Replace Sky in Lightroom?
Yes, Lightroom Classic now offers an AI-powered "Select Sky" tool, which makes it possible to simulate a sky replacement directly inside the app.

While Lightroom doesn't allow you to insert a brand-new sky image like Photoshop does, it provides everything you need to:
- Select and isolate the sky automatically
- Apply adjustments that mimic a new sky
- Keep the editing workflow simple, non-destructive, and fast
For many real estate photo editors, this is more than enough.
Step-by-Step: How to Replace Sky in Lightroom
Here’s how you can replace or enhance the sky in Lightroom without switching to other software:
Step 1: Open Your Photo in Lightroom Classic
Start by importing your real estate image into Lightroom. Ideally, use a RAW file, as it retains more data in the highlights and shadows—especially useful when editing skies.
Step 2: Use the “Select Sky” Mask
In the Develop module, click on the Masking icon, then choose “Select Sky.”
Lightroom will automatically detect and select the sky portion of your image using AI. This selection is accurate in most cases, even around trees and buildings.
This is the first and most important step in learning how to replace sky in Lightroom efficiently.
Step 3: Apply Adjustments to Simulate a Sky Replacement
Now that the sky is selected, apply the following adjustments:
- Exposure: Increase to brighten a dull sky
- Contrast: Add depth and separation from the foreground
- Dehaze: Remove atmospheric haze and boost clarity
- Temperature: Make the sky warmer for sunset tones or cooler for a blue-sky effect
- Saturation: Enhance the color vibrancy subtly
Although Lightroom doesn't allow actual sky swapping, these tools let you simulate dramatic changes without compromising realism.
Step 4: Optional – Export to Photoshop for Full Sky Swap
If your client requests a specific sky (such as a sunset, dramatic clouds, or twilight scene), you can export the photo to Photoshop:
- Right-click > Edit in Photoshop
- Use the Sky Replacement feature
- Save and return to Lightroom for further adjustments

However, for the majority of real estate photo edits, full sky replacement isn’t necessary. Most properties benefit from subtle, believable enhancements using only Lightroom.
Best Practices for Sky Replacement in Real Estate Photography
Although enhancing the sky can improve an image, overdoing it may make the photo look unrealistic or even misleading. Therefore, here are some best practices to follow:
- Match the lighting and shadow direction of the sky with the rest of the photo
- Avoid overly saturated or dramatic skies that draw attention away from the property
- Maintain a consistent look across a full gallery or listing
- Use sky adjustments that suit the time of day and weather conditions naturally
These practices help maintain professionalism and trust, especially important in the real estate industry.
Lightroom vs. Photoshop: Which Should You Use?

Both Lightroom and Photoshop are excellent tools, but they serve different purposes in the context of sky replacement.
| Feature | Lightroom | Photoshop |
| AI Sky Detection | Yes | Yes |
| Ability to Add New Sky | No | Yes |
| Workflow Speed | Fast | Slower |
| Best for Real Estate Teams | Yes | Only when necessary |
For quick edits and batch workflows, Lightroom is the more efficient option. Photoshop is better suited for specific client requests or marketing materials that require more creative control.
Conclusion
Learning how to replace sky in Lightroom can significantly improve your real estate photography workflow. With powerful AI tools and smart adjustment features, Lightroom offers a fast, efficient, and professional way to enhance dull skies - without relying on complex software.
More importantly, this technique helps create visually consistent, high-quality images that support your property marketing goals.
If you’re a real estate photographer or agency looking to save time and improve results, sky editing in Lightroom is a skill worth mastering
Read More
10 Best Photo Editing Programs for Real Estate in 2024
How Long Does It Take to Be a Professional Photography Editor?
AI Tools for Real Estate Photo Editing: Reinventing Property Marketing
120 responses to “How to Replace Sky in Lightroom for Real Estate Photography”
You’ve clearly done your research, and it shows.
This content is gold. Thank you so much!
Thank you for offering such practical guidance.
Thank you for being so generous with your knowledge.
You clearly know your stuff. Great job on this article.
I wasn’t sure what to expect at first, but this turned out to be surprisingly useful. Thanks for taking the time to put this together.
I’ve bookmarked this post for future reference. Thanks again!
I’ve read similar posts, but yours stood out for its clarity.
Thanks for addressing this topic—it’s so important.
Great job simplifying something so complex.
Your breakdown of the topic is so well thought out.
You clearly know your stuff. Great job on this article.
This is such a well-written and insightful article! The step-by-step breakdown for enhancing the sky in Lightroom is not only easy to follow but also incredibly practical—especially for real estate photographers and editors looking to streamline their workflow without sacrificing quality.
I really appreciate how the author emphasized maintaining realism and consistency across edits, which is so important in building trust through visual presentation. The comparison between Lightroom and Photoshop was also helpful for deciding which tool fits different editing needs.
Thank you for sharing this valuable guide! I’m currently exploring more about real estate photo editing myself, and often read additional tips at phephotos.com/blog
, happy to learn more from the community here!
Thank you for covering this so thoroughly. It helped me a lot.
I wasn’t sure what to expect at first, but this turned out to be surprisingly useful. Thanks for taking the time to put this together.
I’m definitely going to apply what I’ve learned here.
Thanks for taking the time to break this down step-by-step.
Your content never disappoints. Keep up the great work!
This is one of the best explanations I’ve read on this topic.
You explained it in such a relatable way. Well done!
Thank you for offering such practical guidance.
I’ve read similar posts, but yours stood out for its clarity.
This was a very informative post. I appreciate the time you took to write it.
Thank you for putting this in a way that anyone can understand.
Very useful tips! I’m excited to implement them soon.
You have a real gift for explaining things.
I appreciate how genuine your writing feels. Thanks for sharing.
You’ve clearly done your research, and it shows.
I really needed this today. Thank you for writing it.
This gave me a lot to think about. Thanks for sharing.
Great article! I’ll definitely come back for more posts like this.
This content is gold. Thank you so much!
You bring a fresh voice to a well-covered topic.
I like how you kept it informative without being too technical.
Such a refreshing take on a common topic.
This helped clarify a lot of questions I had.
What a helpful and well-structured post. Thanks a lot!
Very useful tips! I’m excited to implement them soon.
I feel more confident tackling this now, thanks to you.
Very relevant and timely content. Appreciate you sharing this.
I never thought about it that way before. Great insight!
Such a simple yet powerful message. Thanks for this.
Keep writing! Your content is always so helpful.
I agree with your point of view and found this very insightful.
This is exactly the kind of content I’ve been searching for.
I agree with your point of view and found this very insightful.
Posts like this are why I keep coming back. It’s rare to find content that’s simple, practical, and not full of fluff.
You made some excellent points here. Well done!
I’ll be sharing this with a few friends.
This gave me a whole new perspective on something I thought I already understood. Great explanation and flow!
Thanks for taking the time to break this down step-by-step.
I appreciate the depth and clarity of this post.
I appreciate your unique perspective on this.
Your thoughts are always so well-organized and presented.
Such a refreshing take on a common topic.
You explained it in such a relatable way. Well done!
This post cleared up so many questions for me.
Artistic photography often focuses on revealing the aesthetics of the human form.
It is about composition rather than appearance.
Experienced photographers use natural tones to reflect emotion.
Such images emphasize artistry and personality.
<a href="https://xnudes.ai/" rel="nofollow ugc">https://xnudes.ai/</a>
Every shot aims to show emotion through movement.
The goal is to present inner grace in an artful way.
Observers often appreciate such work for its depth.
This style of photography unites art and aesthetics into something truly unique.
I learned something new today. Appreciate your work!
I’ll be sharing this with a few friends.
I appreciate how genuine your writing feels. Thanks for sharing.
Keep educating and inspiring others with posts like this.
Pamukkale tours Turkey Brian L. – Macaristan <a href="https://ativisautosales.com/?p=1034" rel="nofollow ugc">https://ativisautosales.com/?p=1034</a>
Your passion for the topic really shines through.
This was incredibly useful and well written.
<a href="https://shorturl.fm/JKyiM" rel="nofollow ugc">https://shorturl.fm/JKyiM</a>
This was a great reminder for me. Thanks for posting.
Great article! I’ll definitely come back for more posts like this.
This gave me a whole new perspective on something I thought I already understood. Great explanation and flow!
You’ve done a great job with this. I ended up learning something new without even realizing it—very smooth writing!
I appreciate the depth and clarity of this post.
I feel more confident tackling this now, thanks to you.
You clearly know your stuff. Great job on this article.
What a helpful and well-structured post. Thanks a lot!
This was incredibly useful and well written.
Great article! I’ll definitely come back for more posts like this.
Your writing always inspires me to learn more.
Great points, well supported by facts and logic.
Your writing style makes complex ideas so easy to digest.
I appreciate the honesty and openness in your writing.
Your passion for the topic really shines through.
Thanks for making this so reader-friendly.
Thank you for making this topic less intimidating.
Your tips are practical and easy to apply. Thanks a lot!
You’ve done a great job with this. I ended up learning something new without even realizing it—very smooth writing!
You really know how to connect with your readers.
This gave me a lot to think about. Thanks for sharing.
I’ve read similar posts, but yours stood out for its clarity.
You have a real gift for explaining things.
This helped clarify a lot of questions I had.
Keep educating and inspiring others with posts like this.
This was a great reminder for me. Thanks for posting.
Great job simplifying something so complex.
The way you write feels personal and authentic.
Your thoughts are always so well-organized and presented.
This was very well laid out and easy to follow.
Your passion for the topic really shines through.
I really appreciate content like this—it’s clear, informative, and actually helpful. Definitely worth reading!
This was a great reminder for me. Thanks for posting.
Your articles always leave me thinking.
This post gave me a new perspective I hadn’t considered.
You bring a fresh voice to a well-covered topic.
Great article! I’ll definitely come back for more posts like this.
This was very well laid out and easy to follow.
This gave me a lot to think about. Thanks for sharing.
Posts like this are why I keep coming back. It’s rare to find content that’s simple, practical, and not full of fluff.
This was really well done. I can tell a lot of thought went into making it clear and user-friendly. Keep up the good work!
Keep writing! Your content is always so helpful.
I agree with your point of view and found this very insightful.
Your articles always leave me thinking.
Keep writing! Your content is always so helpful.
Very useful tips! I’m excited to implement them soon.
You’ve clearly done your research, and it shows.
Thank you for putting this in a way that anyone can understand.
Best time to visit Cappadocia Thomas K. ★★★★☆ Underground city tour was fascinating, but our group of 25 felt too crowded. Smaller groups would improve the experience. <a href="https://www.tieseurasia.com/istanbul-tours.html" rel="nofollow ugc">https://www.tieseurasia.com/istanbul-tours.html</a>
Exterior shots are crucial in real estate photography, but dull skies can reduce a property’s appeal. Lightroom’s AI-powered “Select Sky” tool lets you enhance or simulate skies quickly and non-destructively. Adjustments like exposure, contrast, dehaze, temperature, and saturation create vibrant, natural-looking results without Photoshop. Best practices include matching lighting, avoiding over-saturation, and keeping consistency across images. For efficient photo editing and higher-quality listings, contact us <a href="https://phephotos.com/contact-us/" rel="nofollow ugc">here</a>.
This novel is suspenseful. The mystery is good. The The Last Housewife epub is easy to access. The story is emotional. It is a book about truth. Winstead is talented. <a href="https://thelasthousewifeepub.site/" rel="nofollow ugc">https://thelasthousewifeepub.site/</a> The Last Housewife Reviews 2022
Are you ready for a new romance obsession? Shield of Sparrows by Devney Perry is here. The shield of sparrows epub is the preferred format for many modern readers. It allows for instant access and easy storage. Perry’s narrative is compelling, weaving together themes of love and redemption. The digital reading experience is smooth and immersive, perfect for getting lost in a good book. Make sure this title is on your device so you can enjoy it anytime, anywhere. <a href="https://shieldofsparrowsepub.site/" rel="nofollow ugc">https://shieldofsparrowsepub.site/</a> Shield Of Sparrows Who Does Odessa End Up With
The chemistry between the leads is the driving force of this novel. It is electric, palpable, and incredibly sweet. A Better Than the Movies PDF is the vehicle to take you on this ride. It is a story that will restore your faith in the boy next door and the power of a good love song. <a href="https://betterthanthemoviespdf.site/" rel="nofollow ugc">https://betterthanthemoviespdf.site/</a> Better Than The Movies Pdf Download Free Download
If you love a good cry, this book will deliver. Jenny Han writes with emotional impact. The search for the PDF often leads to tearful readers. The Summer I Turned Pretty touches on illness and loss. It is not just a fluffy romance; it has a sad core. The contrast makes the happy moments shine brighter. <a href="https://thesummeriturnedprettypdf.site/" rel="nofollow ugc">https://thesummeriturnedprettypdf.site/</a> The Summer I Turned Pretty Download Epub