
Hit enter to search or ESC to close
Trending Now

In a competitive property market, the lead photo decides whether a buyer clicks on your listing or scrolls past it. Yet many listing photos are over-processed: ceilings turn muddy, windows blow out to white, and colors look so saturated they feel fake. Natural HDR Real Estate Photography solves exactly this problem.
What Is Natural HDR Real Estate Photography?
Natural HDR Real Estate Photography is a technique where the photographer captures several frames at different exposure levels and blends them, while keeping light, color, and contrast close to what the human eye actually sees.
HDR (High Dynamic Range) lets a camera record both the dark corners of a room and the bright view outside the window. What makes it “natural” is the result: a believable image with no halos, no color banding, and no painterly, over-cooked look.
Why Over-Processed HDR Hurts Your Listing
Property photos must be honest. When an image strays too far from reality, buyers feel disappointed at the first showing, and trust in the agent drops. Poor HDR often shifts wall and floor colors away from the real space, adds glowing edges around windows and furniture, pushes saturation to unprofessional levels, and wipes out detail in shadows or highlights. Natural HDR avoids these flaws, so your listing looks more credible from the first glance.
Benefits of Natural HDR Real Estate Photography
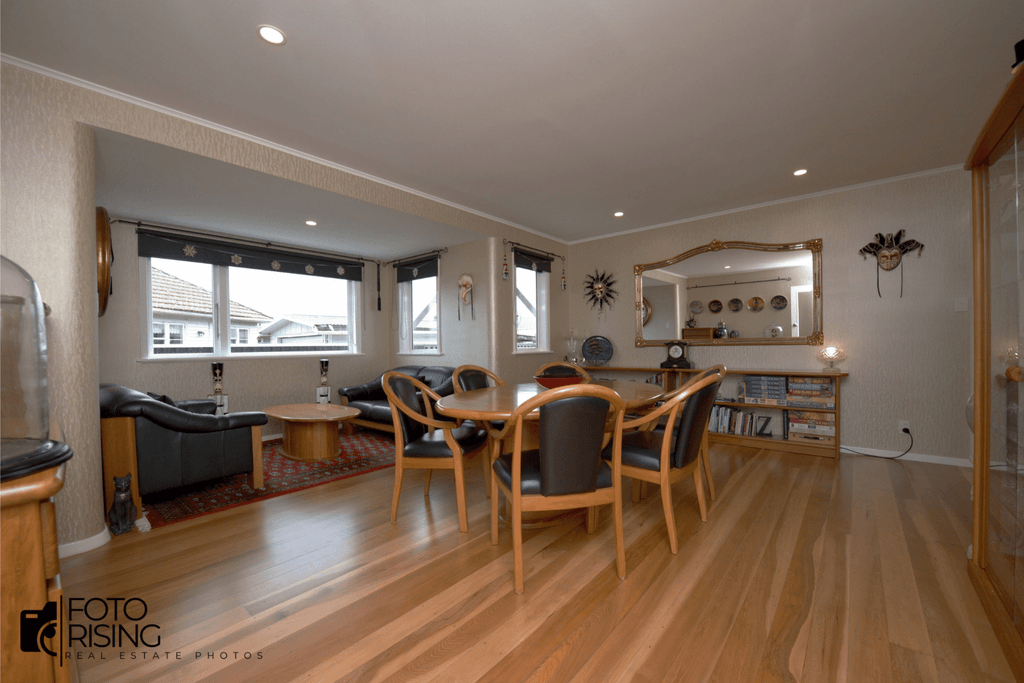
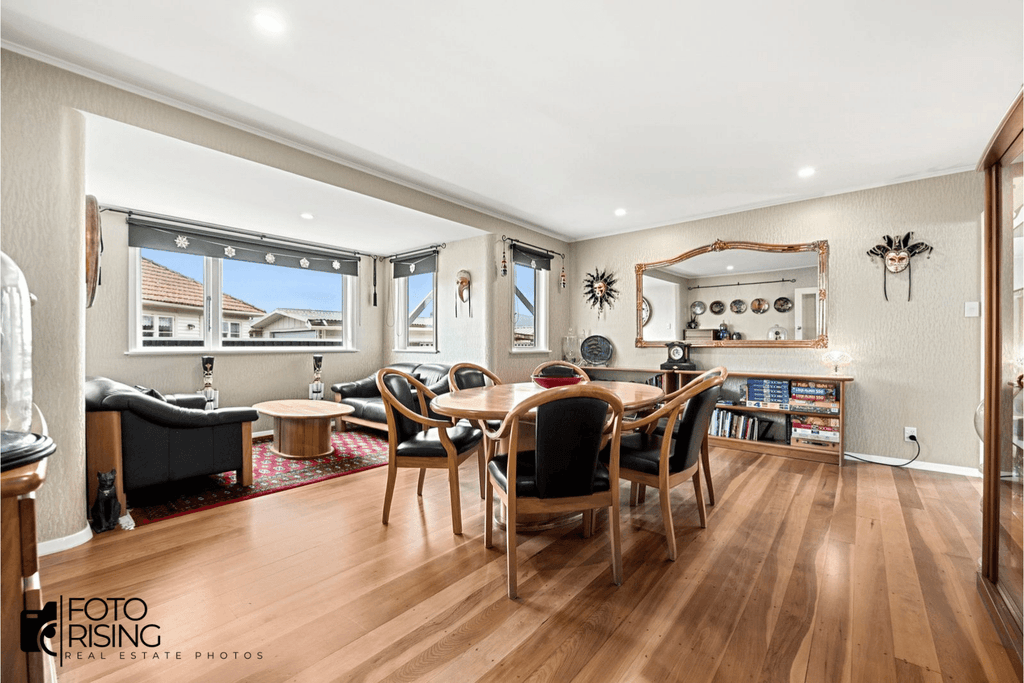
The most obvious benefit is stronger listing appeal. Bright, clear, comfortable-looking rooms keep viewers on your page longer. Just as important is trust: photos that match reality reduce the “looked great online, different in person” problem that frustrates buyers and agents alike.
Natural HDR also preserves the view outside the window, which is a major advantage for high-rise apartments and homes with scenery, since the landscape isn’t blown out to white. Finally, it leads to better-qualified showings. Buyers understand the space before they arrive, so the visitors you get tend to be more serious.
The Natural HDR Shooting Workflow
Prepare Your Gear
You need a camera that shoots RAW and supports bracketing, a wide-angle lens (16-24mm on full-frame works well) to capture small rooms without heavy distortion, and a sturdy tripod so every frame aligns perfectly.
Camera Settings
Shoot three to five bracketed frames, spaced one to two stops (EV) apart. Use an aperture of f/8 to f/11 for sharpness throughout the room, keep ISO low to minimize noise, and lock your white balance so color stays consistent across every frame.
Timing and Lighting
Shoot during the day when outdoor light is soft, which balances interior and exterior exposure. Turn on interior lights deliberately and adjust the curtains just enough to soften the light. For exteriors, early morning or late afternoon golden hour gives the best results.
Composition
Hold the camera at about chest height, keep vertical lines straight, and shoot from the corners of the room to convey depth. Declutter and stage the space beforehand, because every item you remove in person is one less thing to fix in editing.
Post-Processing for a Natural Look
Editing is what makes an image truly natural. Start by merging the exposures in Lightroom, Photomatix, or Aurora HDR, choosing natural-looking settings and avoiding aggressive presets. Next, correct the white balance so white walls actually look white. Then apply a subtle window pull so the outdoor view is visible without looking artificial.
After that, fix converging vertical lines and remove lens distortion. Tame any oversaturated colors, especially oranges and greens, which tend to get pushed too far during merging. Finally, remove small distractions such as cables or outlets when appropriate.
A good rule of thumb: if you can immediately tell an image is HDR, it has probably been pushed too far.
Common Mistakes to Avoid
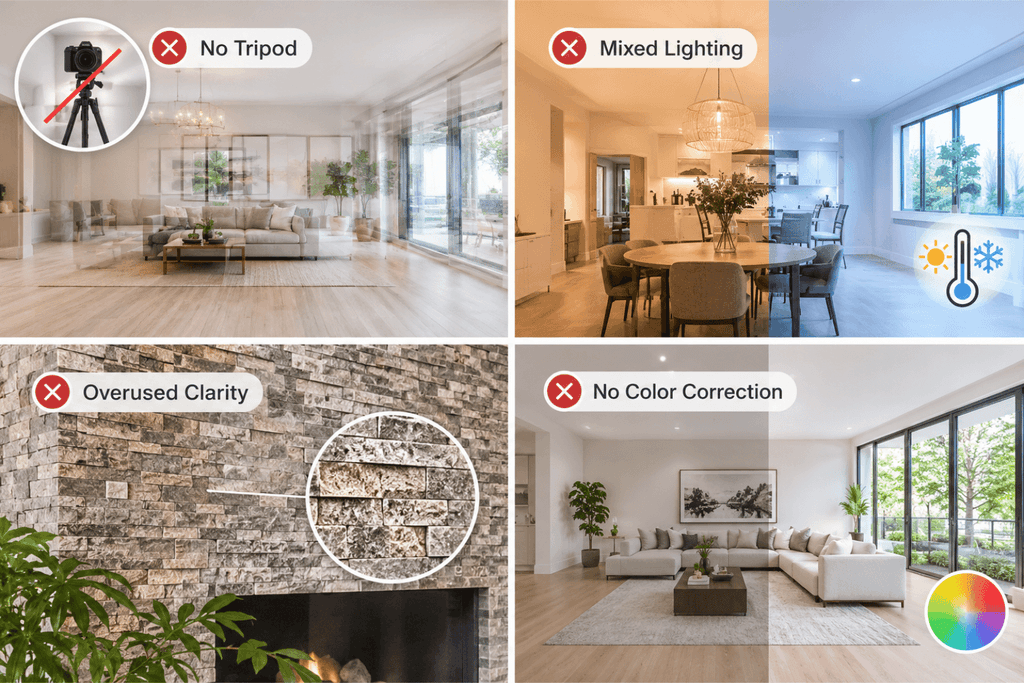
The most frequent error is shooting without a tripod, which misaligns frames and creates ghosting when they merge. Another is mixing light sources with different color temperatures, such as warm bulbs and cool daylight, without correcting for them. Photographers also tend to overuse the clarity and dehaze sliders, which creates harsh, crunchy textures. And some skip color correction altogether because they trust the software to handle it, which rarely ends well.
How to Choose the Right Photographer
When hiring, review their portfolio carefully. Look for natural-looking interiors, straight lines, and windows that retain detail without looking pasted in. Ask about turnaround time, the number of revisions included, and delivery formats such as web-sized images, print files, or 360 tours.
Conclusion
Natural HDR Real Estate Photography is more than a shooting technique. It’s a way to build trust with buyers. Balanced light, accurate color, and clear detail help every listing stand out while staying true to the property. Whether you’re an agent, a homeowner, or a photographer, put naturalness first: the closer your photos are to reality, the more confident buyers will be, and the faster they’ll decide.
Read more:
Professional Property Photo Editing: What Sets It Apart
Real Estate Photo Editing Workflow: 8 Steps to Faster Delivery