
Hit enter to search or ESC to close
Trending Now

The first photo in a listing decides whether a buyer clicks or scrolls past. Dark rooms, yellow color casts, and blown-out windows make even beautiful homes look dull. That is why flambient real estate photo editing has become the go-to technique for professional photographers and brokerages who want bright, natural, true-to-life images. This guide explains what flambient is, how the editing workflow works, and how to choose the right service.
What Is Flambient Photography?
“Flambient” combines two words: flash and ambient. The photographer shoots the same composition several times from a tripod. At least one frame uses only the available light, such as window light and lamps. Others add flash, usually bounced off a ceiling or wall.
Flambient real estate photo editing is the post-production process that blends these frames in Photoshop or Lightroom. The editor aligns the layers, masks the best parts of each exposure, balances color, and cleans up distractions to produce one polished image.
Why Flambient Works So Well for Real Estate
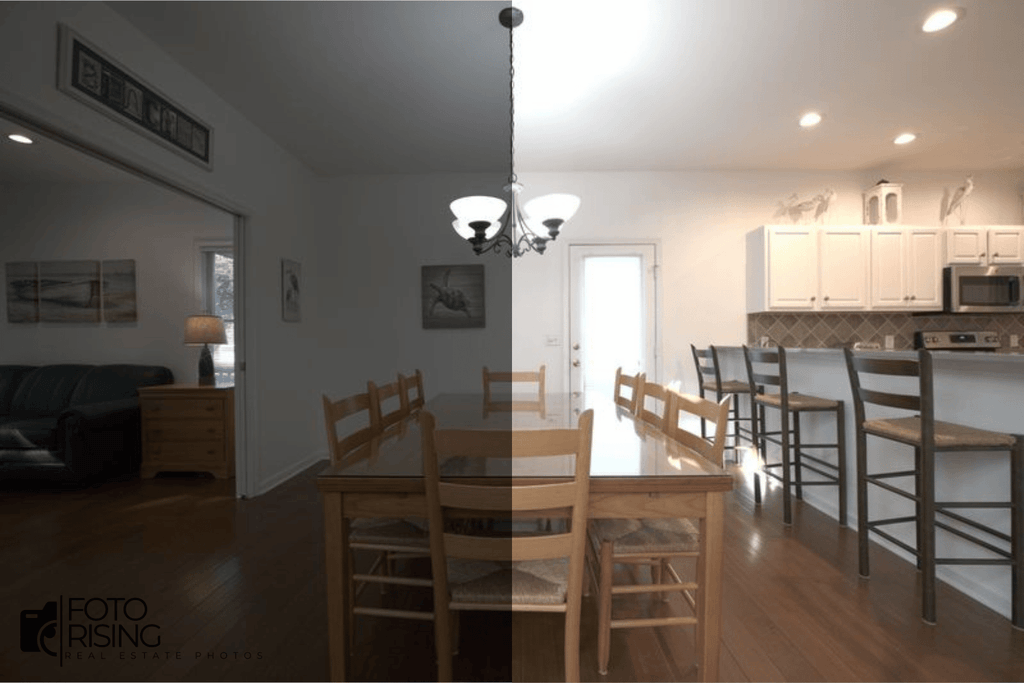
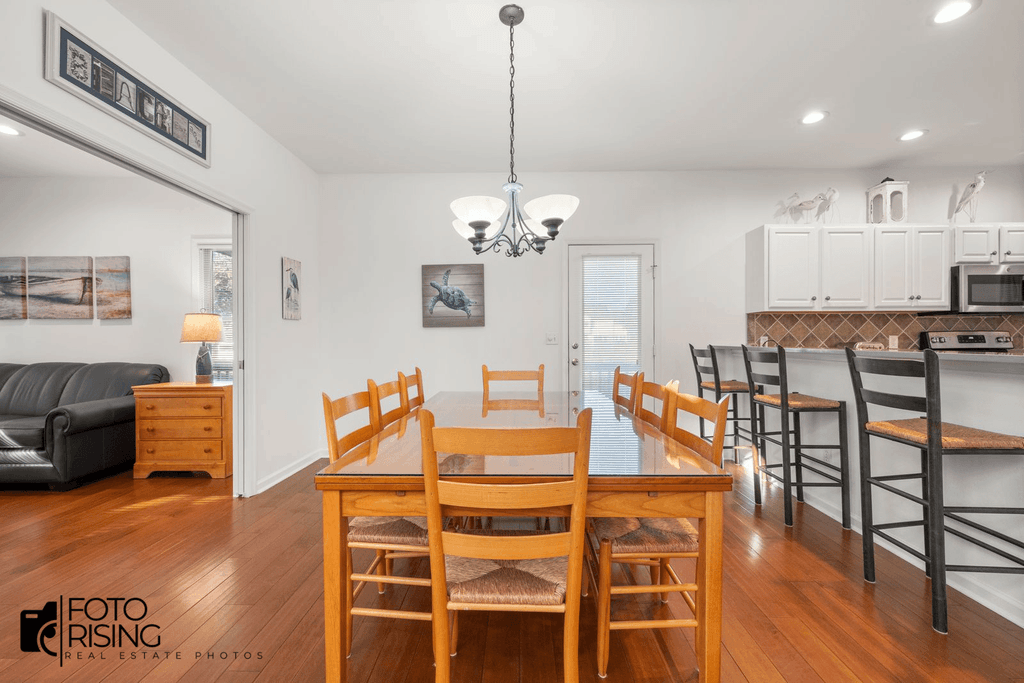
- Accurate color: The flash frame captures the true color of walls, floors, and cabinetry, while the ambient frame preserves the warm mood of the room.
- Even, dimensional lighting: Flash fills in shadows without flattening the space, so rooms feel open and inviting.
- Clear window views: Blending a darker frame lets editors recover the scenery outside instead of leaving white, overexposed panes.
- A natural look: Compared with HDR, flambient images avoid the muddy tones, halos, and over-processed feel that buyers instantly recognize as fake.
The Flambient Real Estate Photo Editing Workflow
1. Start With Solid Source Files
Editing can’t rescue a poor shoot. Photographers should use a tripod, keep the framing identical across frames, shoot in manual mode, and capture RAW files to preserve maximum detail.
2. Import and Align
Editors import the RAW files, apply basic white balance corrections in Lightroom, and open the frames as stacked layers in Photoshop. Precise alignment is essential, since even a small shift causes ghosting.
3. Blend Ambient and Flash
Using layer masks, the editor takes warm light from the ambient frame, clean color and detail from the flash frame, and window views from the darkest exposure.
4. Balance Color and Exposure
This is where a good edit becomes a great one. The editor removes color casts, fine-tunes contrast, and makes sure whites look white and wood tones look natural.
5. Correct Verticals and Perspective
Straight walls and door frames make a room feel stable and professional. Lens distortion and tilt are corrected so lines stay vertical.
6. Clean Up Distractions
Depending on the order, editors may remove cords, outlets, small stains, or reflections of the flash and camera in mirrors and glass.
7. Export for Delivery
Final images are exported at the right size and file weight for MLS uploads, websites, social media, or print brochures.
Flambient vs. HDR: Which Should You Choose?
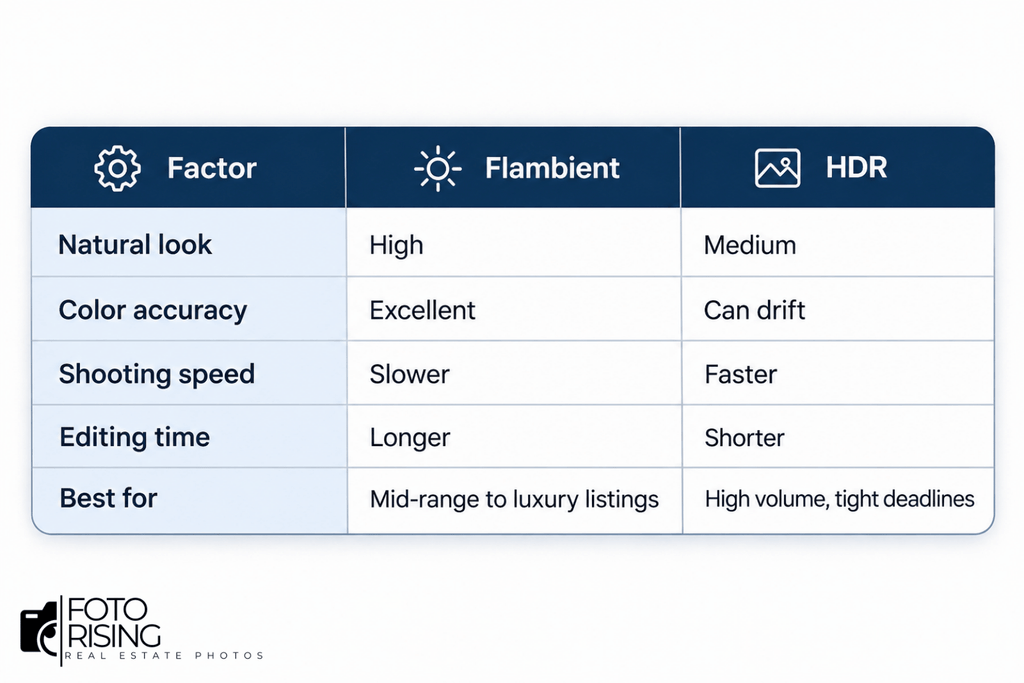
If image quality is the priority, flambient is usually worth the extra effort. For large batches or fast turnarounds, HDR remains a practical option.
How to Choose a Flambient Photo Editing Service
- Review before-and-after samples: A strong portfolio is the fastest way to judge real skill.
- Ask about turnaround time: Many providers deliver within 12 to 24 hours, which matters when a listing needs to go live quickly.
- Check the revision policy: Reliable services state clearly how many free revisions you get.
- Confirm file requirements: Ask whether they accept RAW or JPEG and how many bracketed frames they need per scene.
- Start with a trial order: Send a few images first before committing to a full project.
Common Flambient Editing Mistakes
- Misaligned layers caused by camera movement between shots.
- Flash that is too strong, which erases the warm atmosphere of natural light.
- Over-editing that leaves images flat, artificial, or surrounded by bright edges.
- Forgetting the window pull, leaving windows blown out.
Tips for Better Results
Photographers can make editing faster and cleaner by turning off ceiling fans, tidying the room before shooting, using a remote shutter release, and keeping flash power consistent across a scene. A little discipline on location saves a lot of correction time later.
Final Thoughts
Flambient real estate photo editing delivers bright, color-accurate, natural-looking images that help listings stand out and attract more qualified buyers. Whether you are a photographer outsourcing post-production, an agent preparing a listing, or a brokerage scaling your visual content, understanding the workflow helps you set the right standards and get consistent results.
Ready to upgrade your listing photos? Send a sample set to a professional flambient editor and compare it side by side with your current images. The difference is usually obvious right away.
Read more:
Natural HDR Real Estate Photography: Photos That Sell
Real Estate Image Enhancement Services | Sell Faster